June 26, 2019No Comments

Hiking Bobotov Kuk in Montenegro

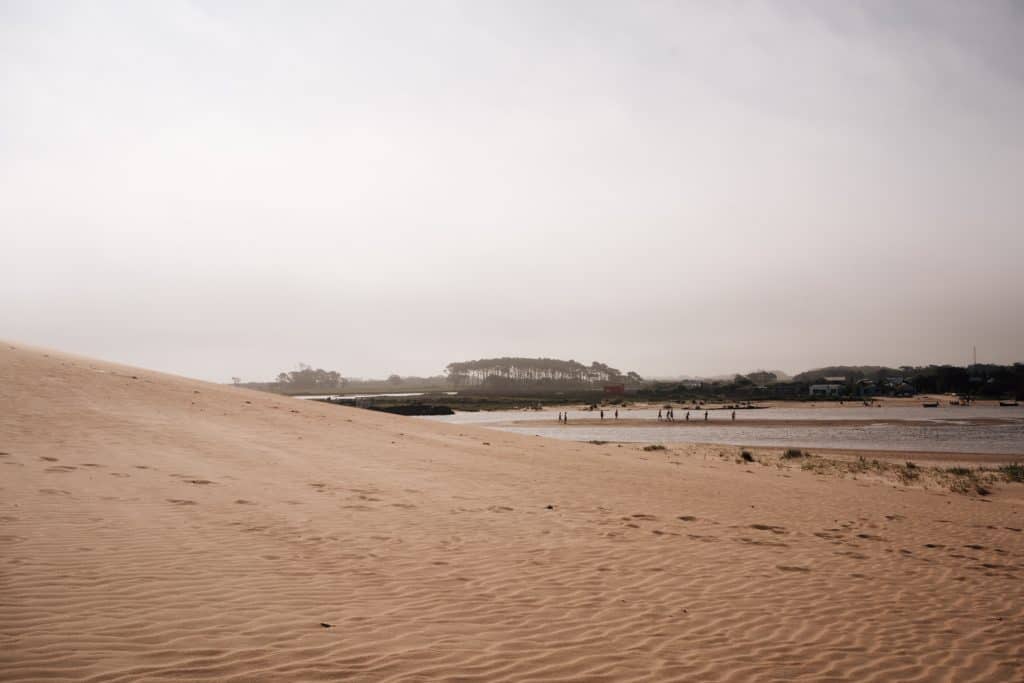
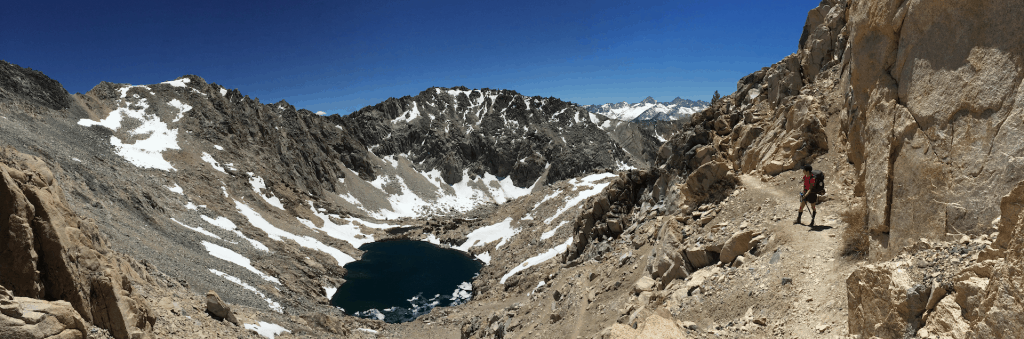
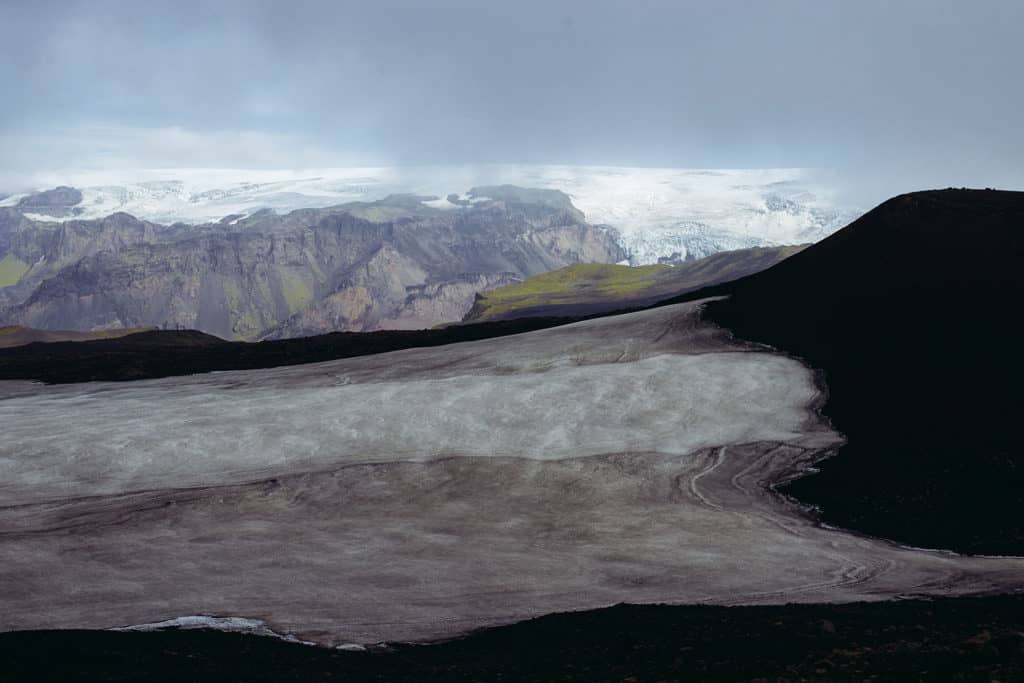
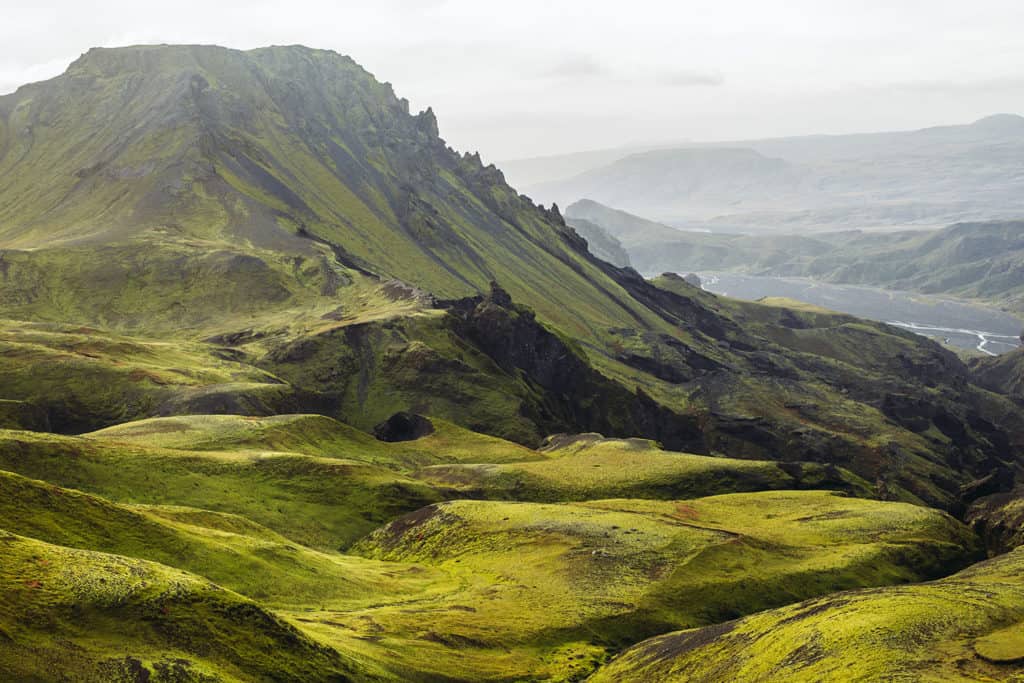
For anyone traveling in Eastern Europe and looking to spend some time outdoors, Durmitor National Park has lots to offer — canyons, glacial lakes, mountains, and plateaus. The challenging hike to Bobotov Kuk's summit offers a diverse mix of scenery and a rewarding end view that spans multiple countries. We cover logistics around a two-day northern approach to Bobotov Kuk starting and ending in Žabljak.

  • Distance: ~12.5 miles.
  • Elevation: 8274 ft / 2522 m
  • Duration: 1-2 days (you can do it in ~10 hours in a roundtrip day hike). We split it up into 2 days.
  • When: Summer and early Fall (we went September 11).
  • Difficulty: Moderate (a lot of scree and sun exposure).

Good to know:

  • Parking & fees. Pay 3 Euros for park entry and park in the parking lot of Crno Jezero overnight.
  • Bring a water filter and fill up often. There were only two water sources (a lot of the lakes dry up). One of the water sources was muddled with dirt and had livestock living close by. The other we couldn't even find.
  • Stove compatibility. Screw-top propane tanks are almost impossible to find. Instead, they use puncture based propane stoves, available at the grocery store. For us, this meant eating our meals cold, a nice introduction to "stoveless" hiking — though warm meals are a nice luxury.
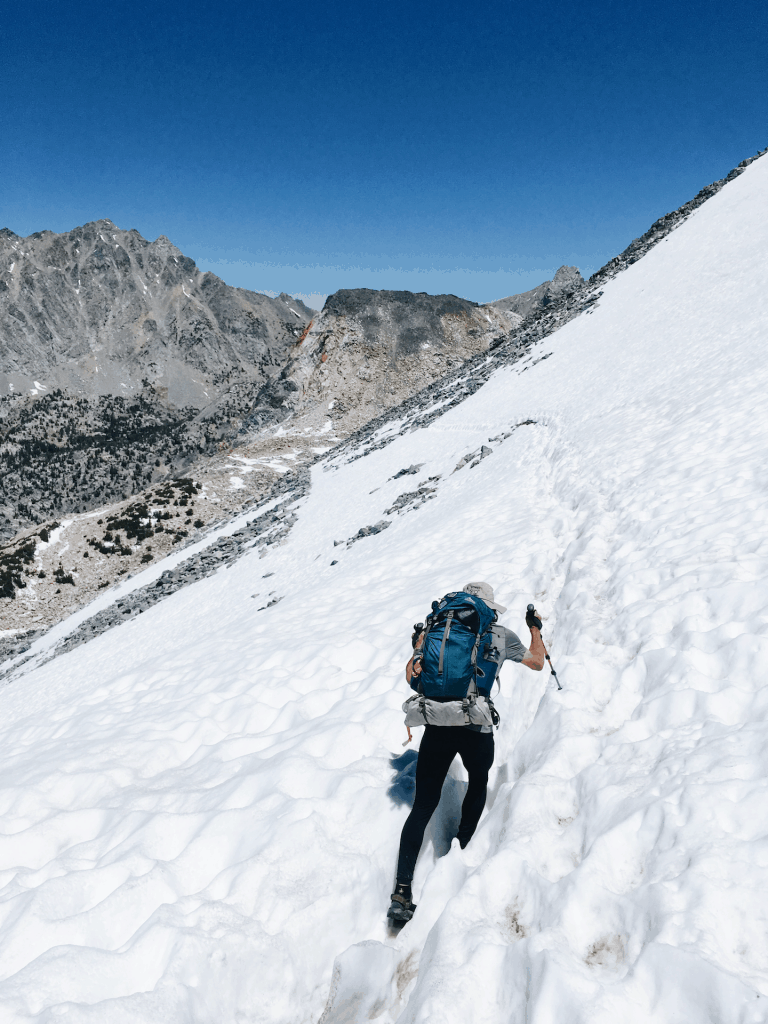
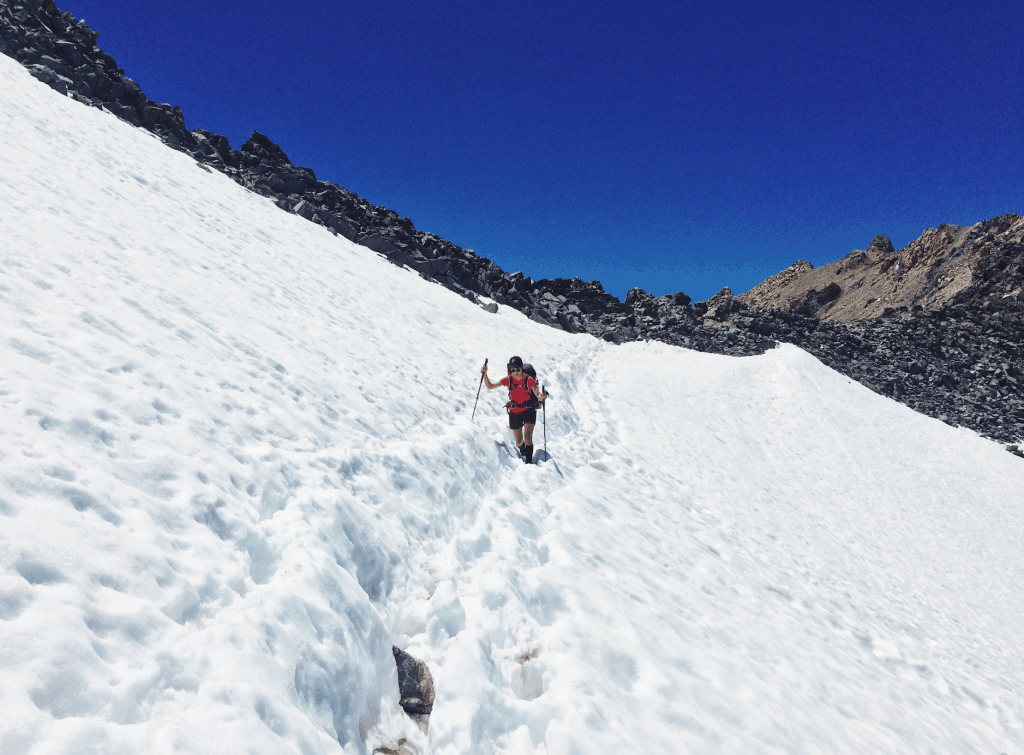
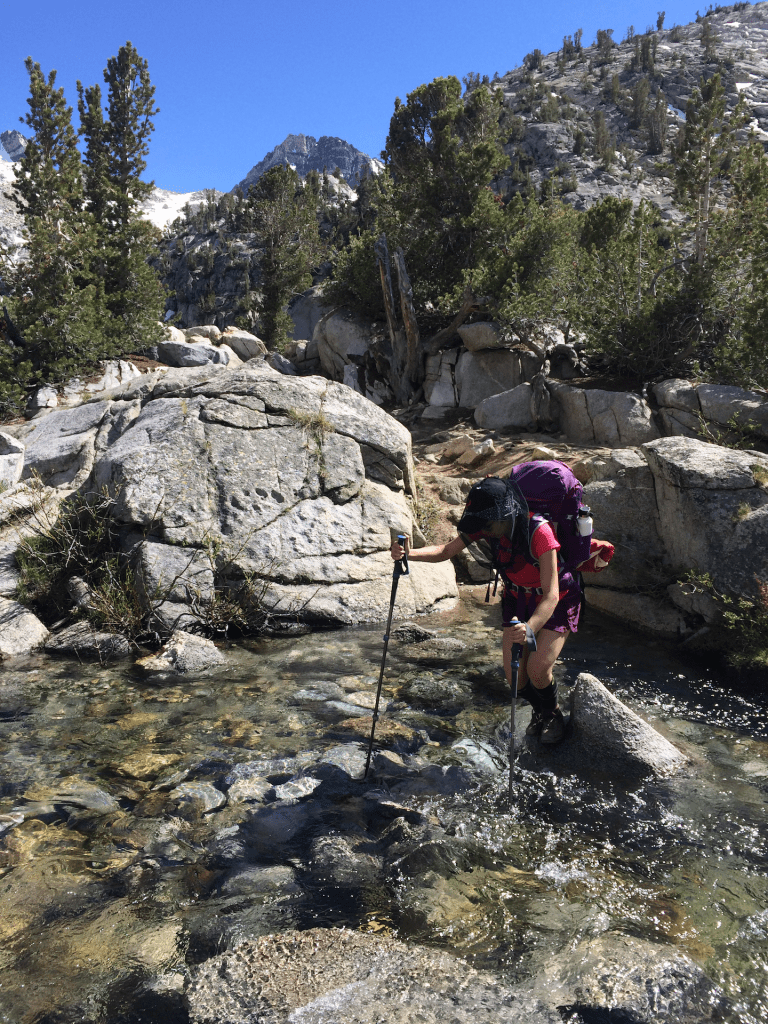
  • Bring hiking poles or hiking boots. There was a ton of scree, so we were grateful for our poles. Doable to hike without them, but you can easily slip or twist your ankle. So ideally, you have hiking boots if you don't have hiking poles.

Day 1 - Crno Jezero, Žabljak to Katun Lokvice
3.5 miles, ↑ 5,562 feet elevation gain (GPS log)

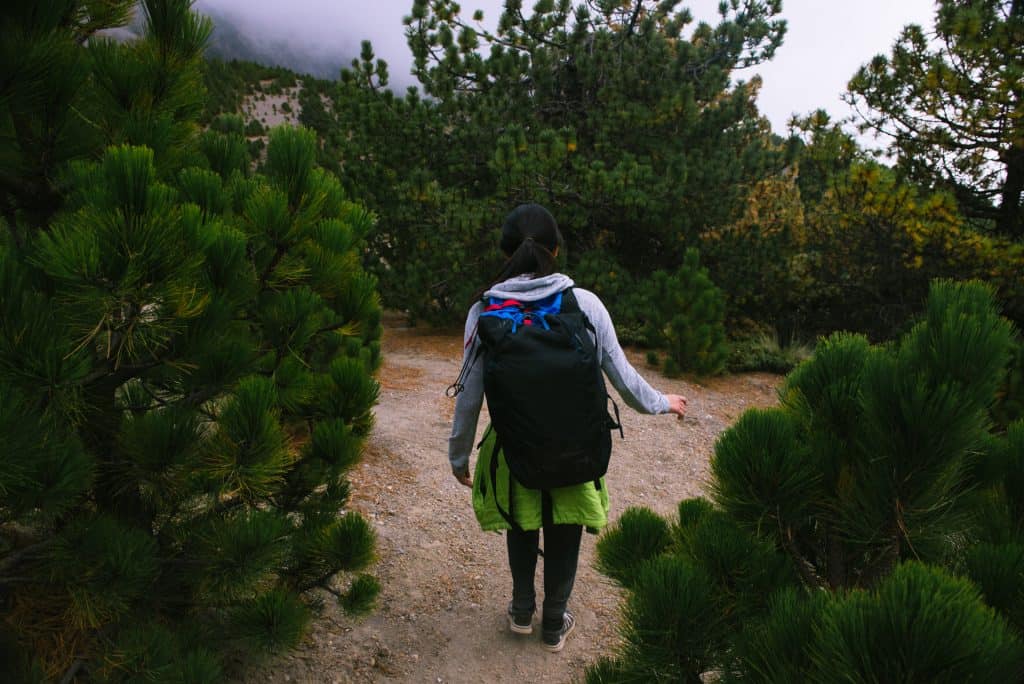
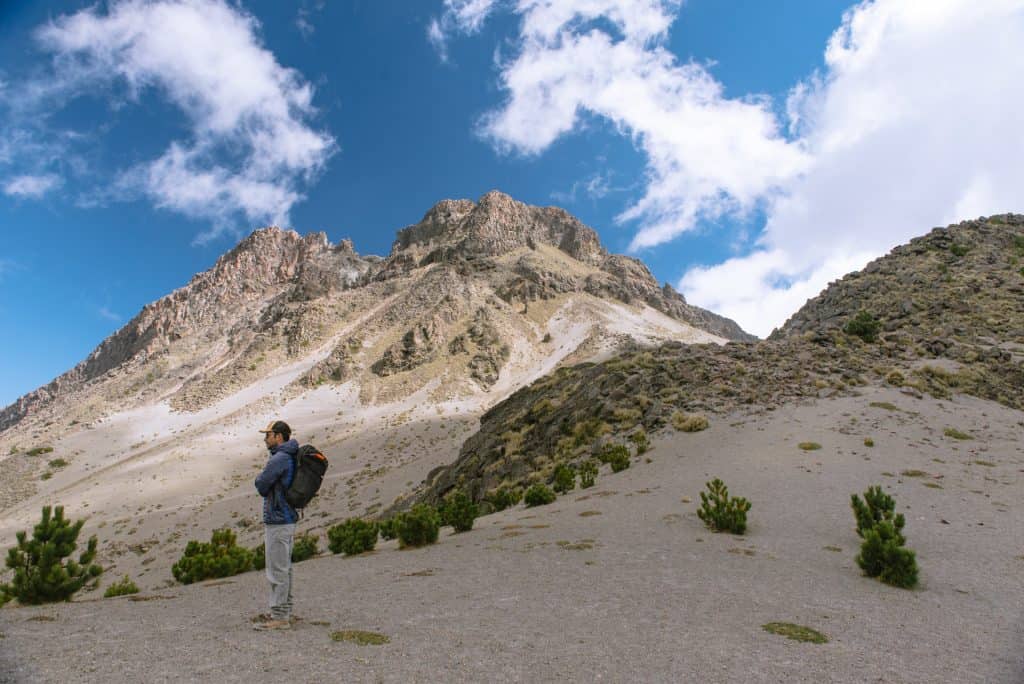
Žabljak, a charming ski town, is a great launching point for the hike. It's home to bakeries, supermarkets, restaurants, and plenty of places to stay –and a great place for stocking up before your hike. To reach the trailhead from the center of Žabljak, follow the signs to Crno Jezero (Black Lake). We were lucky to have a rental car to drive there, as its quite a long walk from the town center to the trailhead.

Crno Jezero has a huge parking lot where you're free to park your car overnight. We lucked out and got a spot right in front of the ranger booth at the start of the path. There we paid a small fee and the ranger took down our names. Before setting out you'll want to check the weather with the ranger, as Bobotov Kuk has a reputation for unpredictable weather.

We set off through a corridor of trees and tea, fig, and mushroom vendors, and found ourselves in the company of families and visitors enjoying a day at Crno Jezero. The end of the path brought us to a majestic reveal of the glacial lake Crno Jezero and the last bathroom before the start of the hike. We took in the sights and then split off the main road to head towards Katun Lokvice.

Man looks towards valley with rocks and greenery

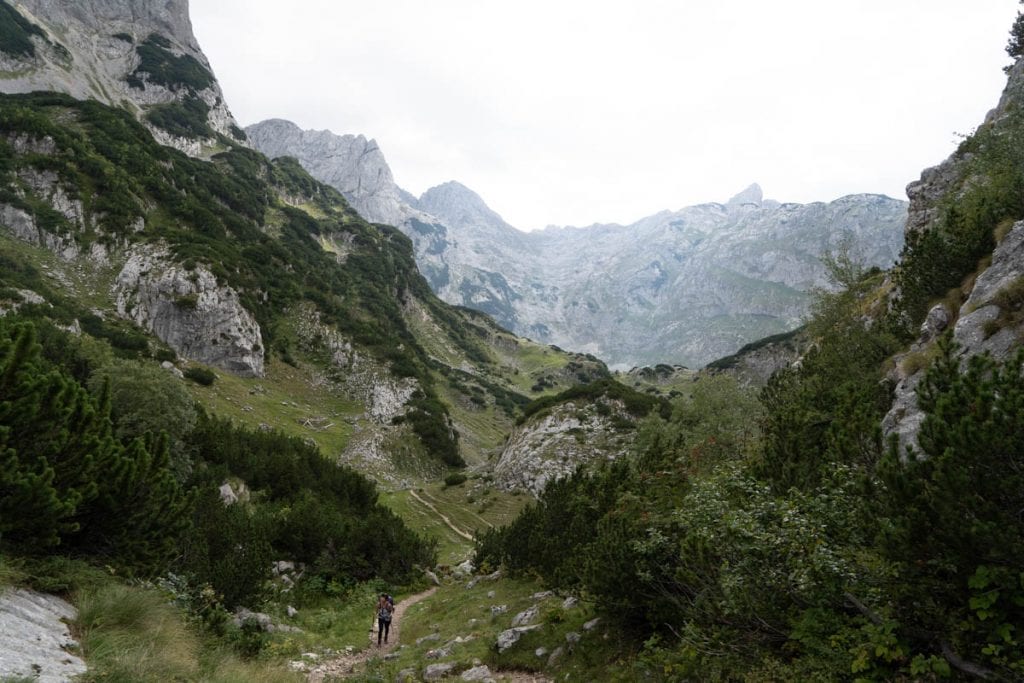
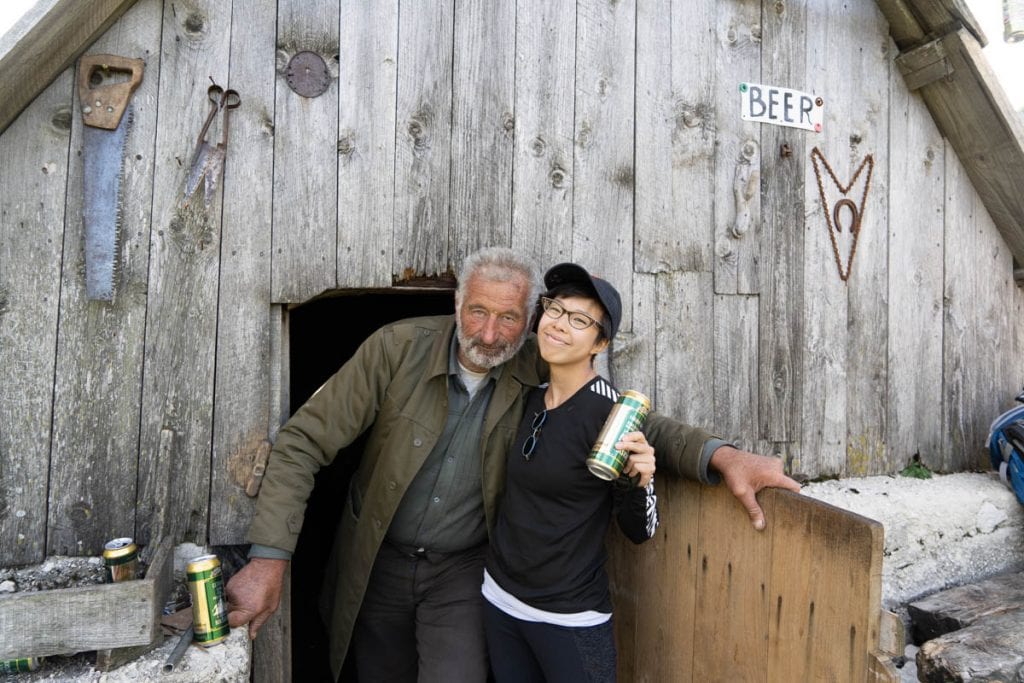
It takes around 1.5 - 2 hours to reach the Katun Lokvice campsite and to my delight, the path there is lined with conifer trees and raspberry shrubs. The path is straightforward (rocks are marked with a white circle with a red outline) until you reach a rock spray-painted with signs that pointed in all directions. It took a crew of confused hikers to decide to take the path to the right. Following it, we were eventually brought to a sign that proudly proclaimed 'BEER.' Which was a big feat considering that someone or a donkey had to lug it up deep into the valley. The sign was fixed on the house of a farmer who manned the campground alongside his farm and few livestock. The campsite is free, though there's a small fee if you want to stay in the (barebones) lean-to. The best part is the backdrop opens up to a spectacular view of the mountains.

Katun Lokvice farmer campsite

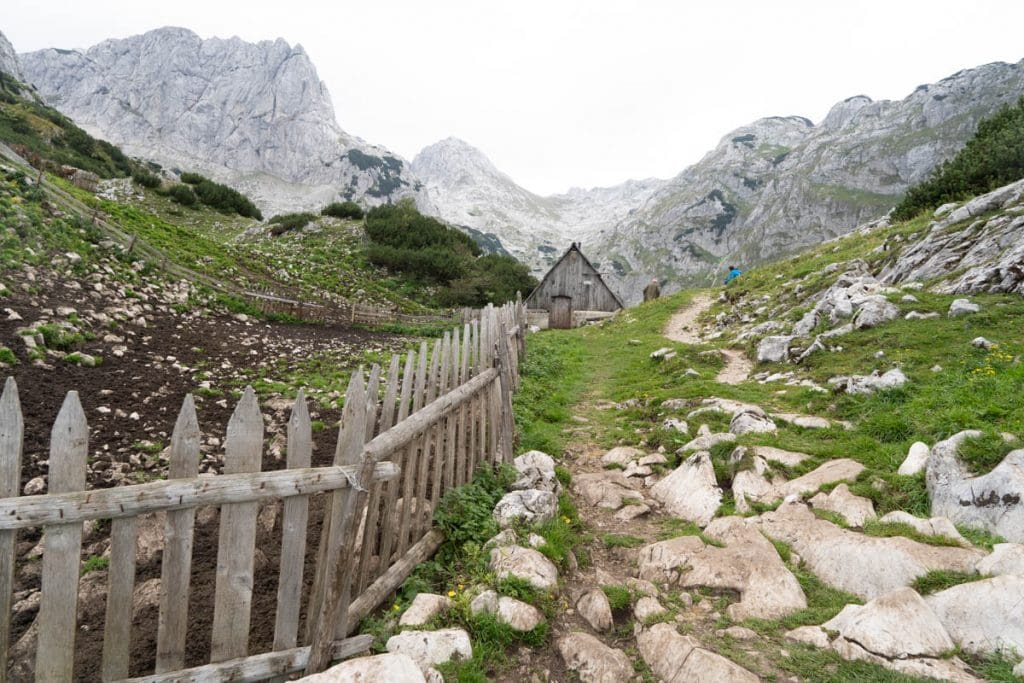
The campsite is conveniently near a water source (just continue on the trail for another 3-min and you'll see the word 'voda' scrawled on a rock ?). When we came across it, the water source was a trickle of a tiny stream that used to belong to a lake that has since dried up – and from what we heard, other campsites that use to have a water source had entirely dried up, though this may differ season to season. The dribble of water was a little murky and close to livestock so we used a Sawyer filter in case.

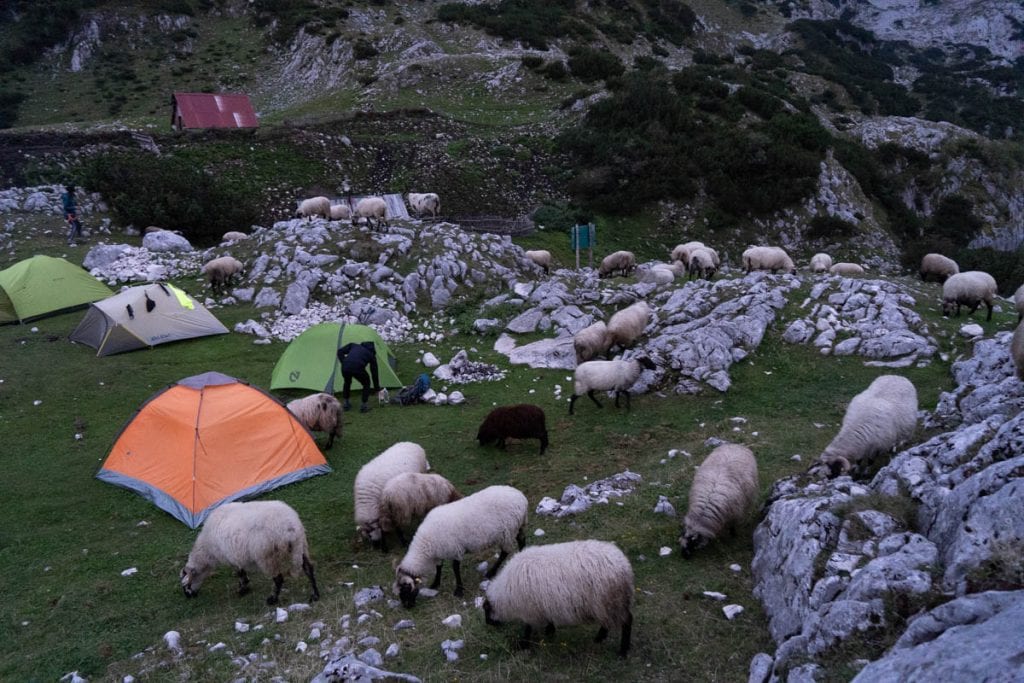
There were five tents set up at the campsite, filled with hikers from Germany, Russia, and Israel. Together with the groundskeeper a few of us got a fire going and as the sky turned to dusk, our motley crew gathered to dance around the fire and exchange stories. While the air was chilly, we were warmed by the fire and the Nikšićko beers supplied by the groundskeeper. At one point, in the dark of the night, we heard the approach of an ominous jangling sound coming from beyond our view of sight. Our conversations tapered off in anticipation of what was to arrive – but we soon burst out laughing when we realized it was simply a flock of sheep that was returning home. They flooded through our campsite and returned to their pen beside the gatekeeper's home.

Sheep at dusk in montenegro
Sheep are roaming through the campsite

Day 2 - Katun Lokvice to Bobotov Kuk to Katun Lokvice
9 miles, ↑ 7,960 feet elevation gain
(GPS Log. Missing 3 hours)

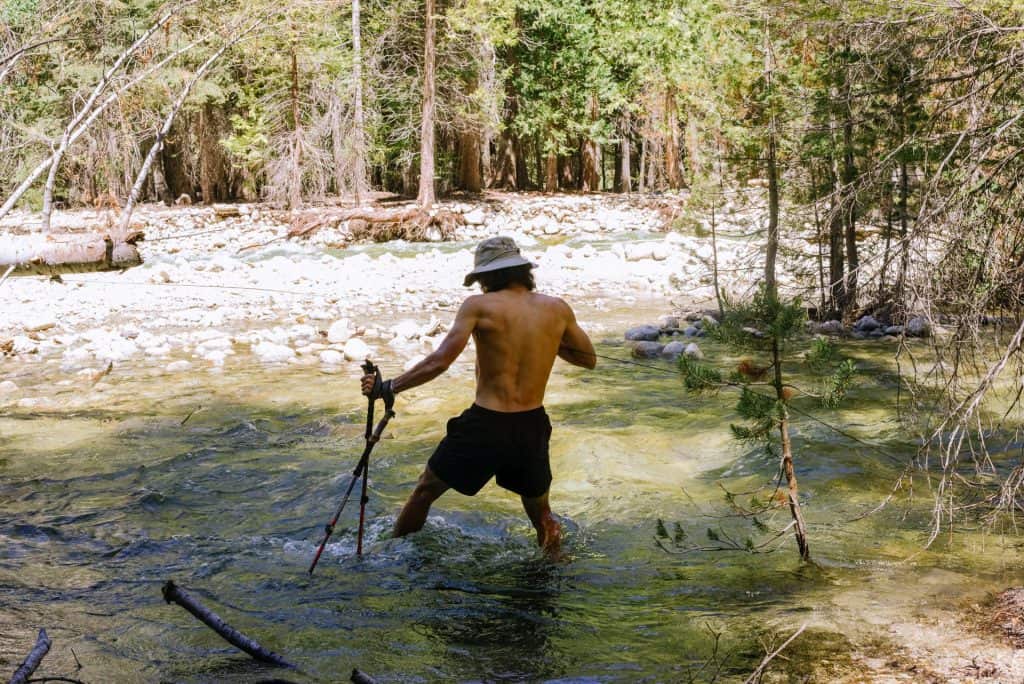
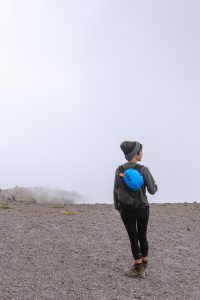
The morning was jarringly cold. While the backdrop of the mountains made for an epic view, it meant that our side of the valley was shrouded in darkness for a good half of the morning. I pulled on as many layers as I could find, regretting my decision not to pack gloves for the hike. We put on a light pack with essentials and left the rest of our stuff at the campsite. Definitely make sure to fill up your water bottles before setting out since we didn't see water the entire route (again all dried out! Or too hard to spot), and you'll be SWEATING before you know it.

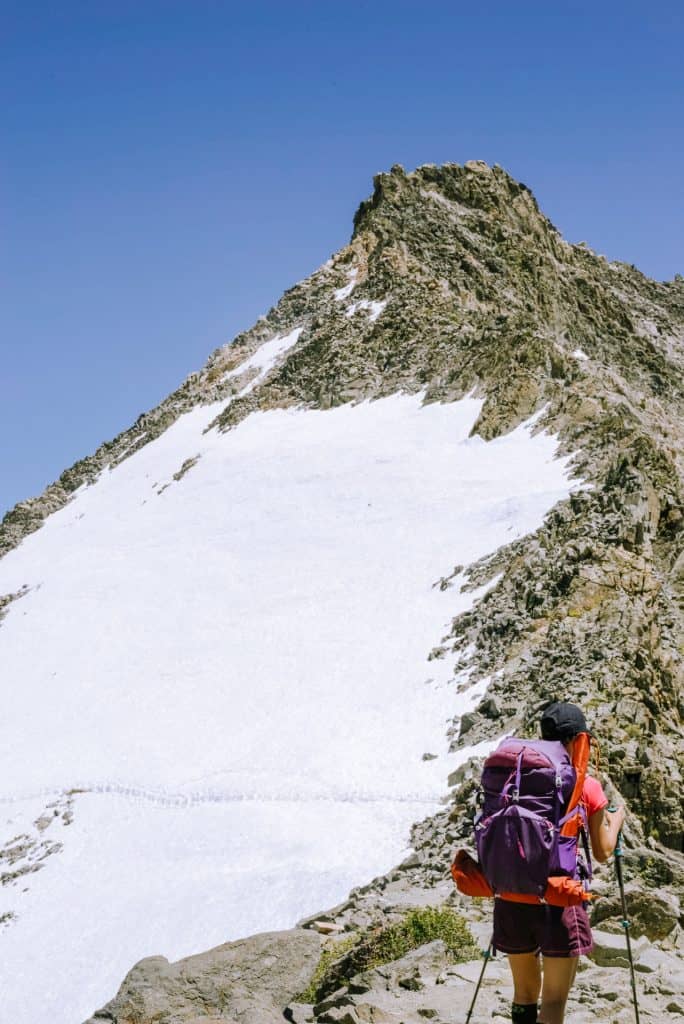
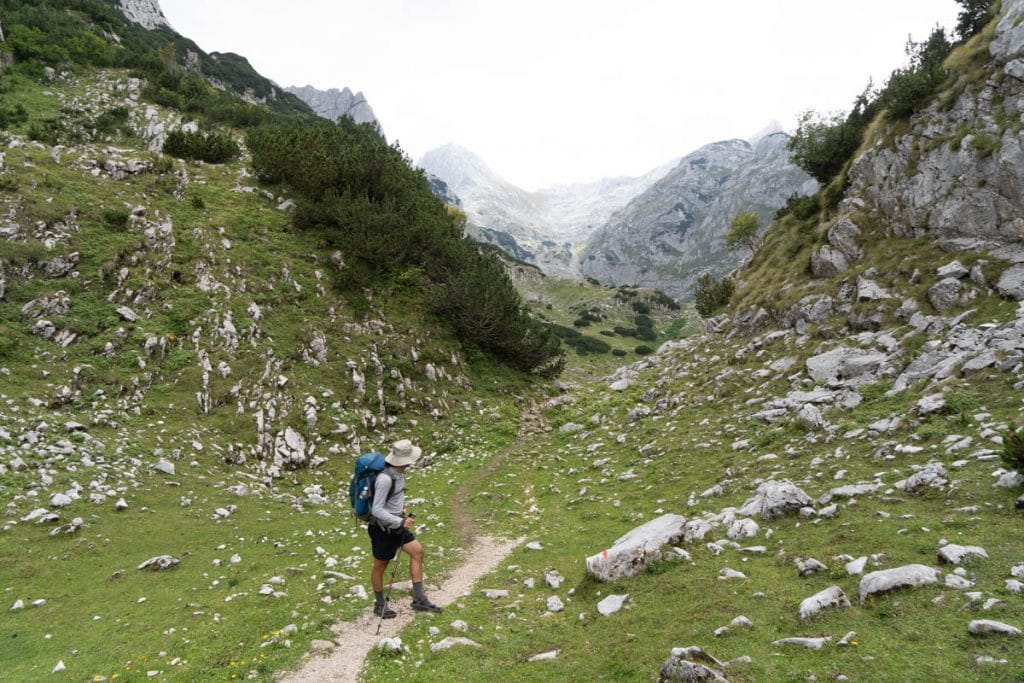
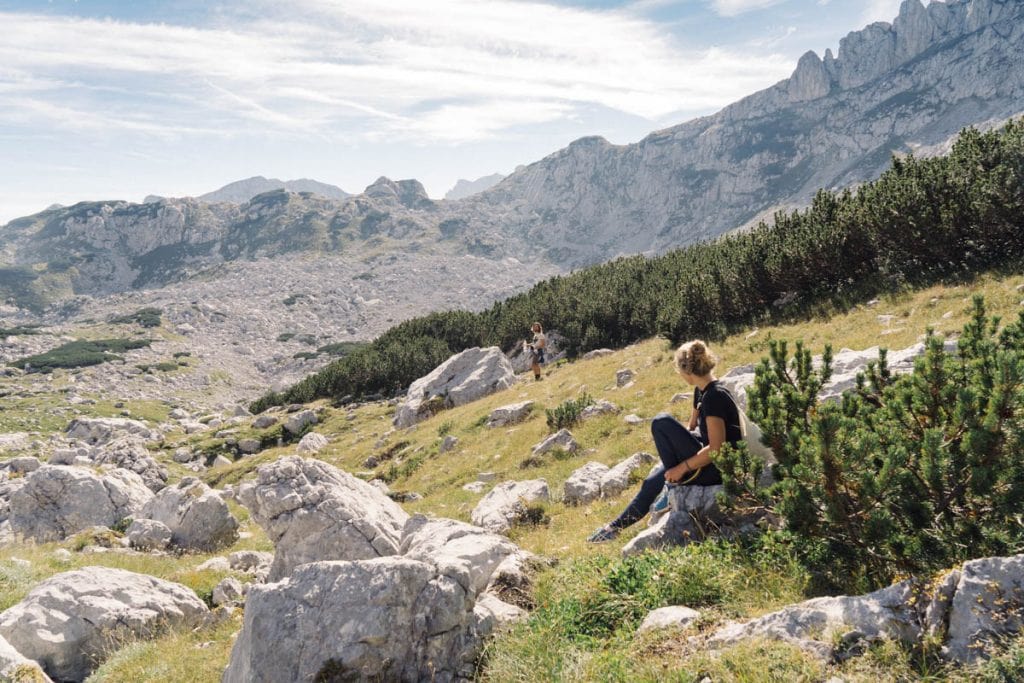
We were immensely grateful the moment the sun rose high enough to thaw our fingertips. From there on, the sun's rays intensified and the climb got steeper, and by the top, we had almost shed all our layers. Almost two hours in, it was hard to believe that we were on the same day and climate as the morning. We crossed a quarry field, scrambling over large loose rocks, completely exposed to the relentless sun. To be honest, it was mainly thanks to Jaffa cakes and Mott fruit gummies that I was able to stay motivated on the long slog uphill.

Person sits on grassy path with boulders to Bobotov Kuk

We decided to skip the ice caves due to its lackluster review from other hikers, who described it as a "Mere pile of snow. Barely." So, we charged straight towards Bobotov Kuk.

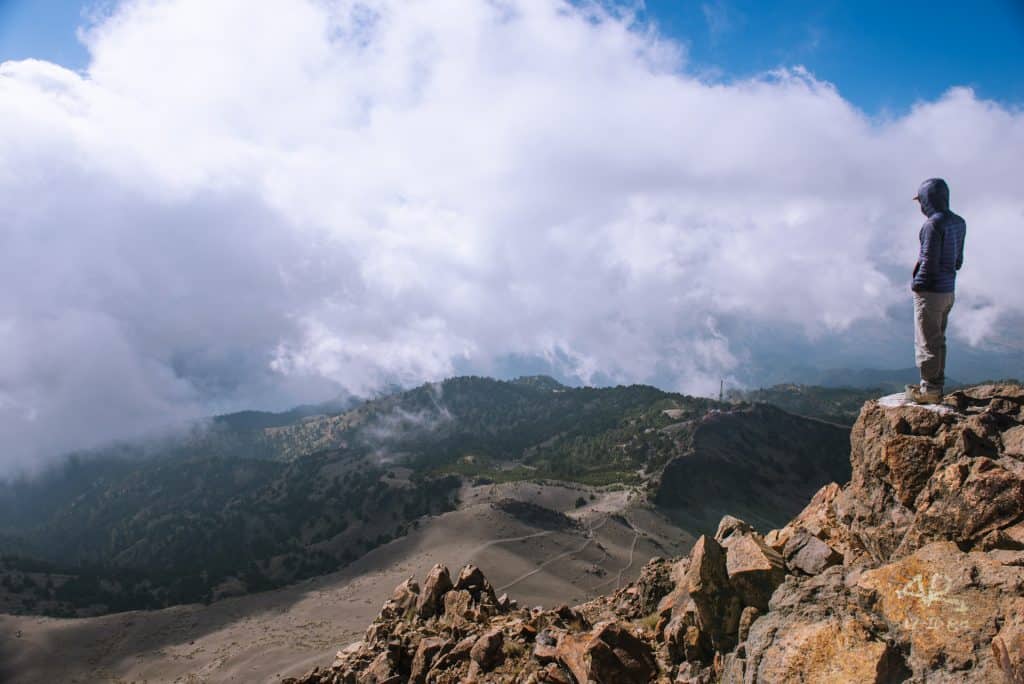
Nearing the top, you might be satisfied with the already incredible views and be tempted to call it a day, but I encourage you to continue because the views only get better. If you have a fear of heights or are prone to vertigo you might want to sit out the final climb up Bobotov Kuk. Otherwise, with the support of sturdy cable ropes, you can hike/haul your way up to the summit.

Man ascends the vertical face of Bobotov Kuk by using a cable

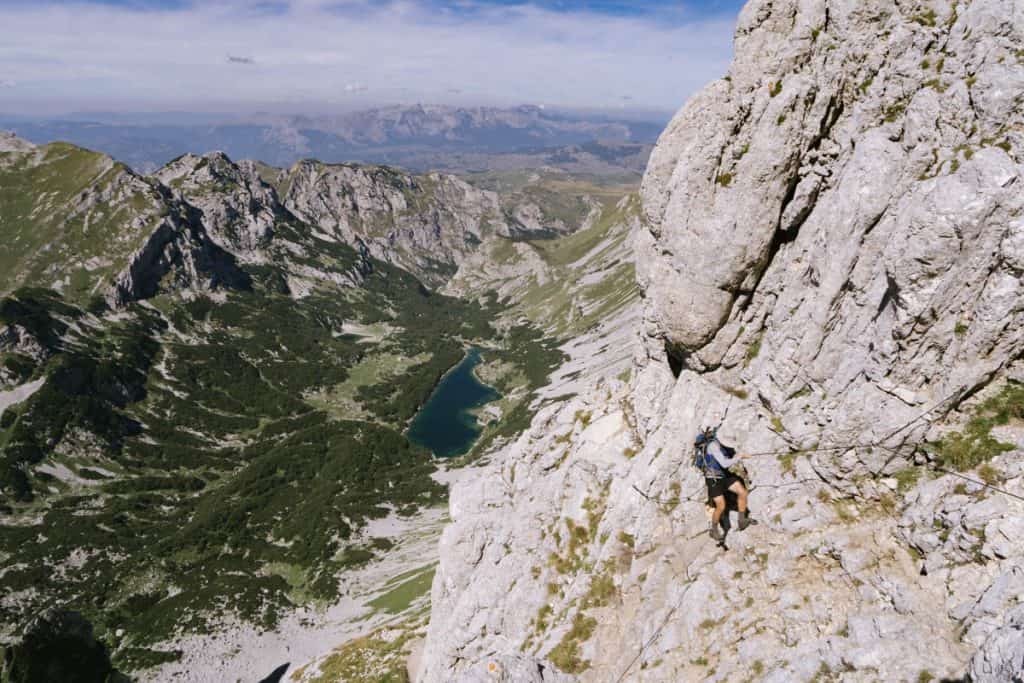
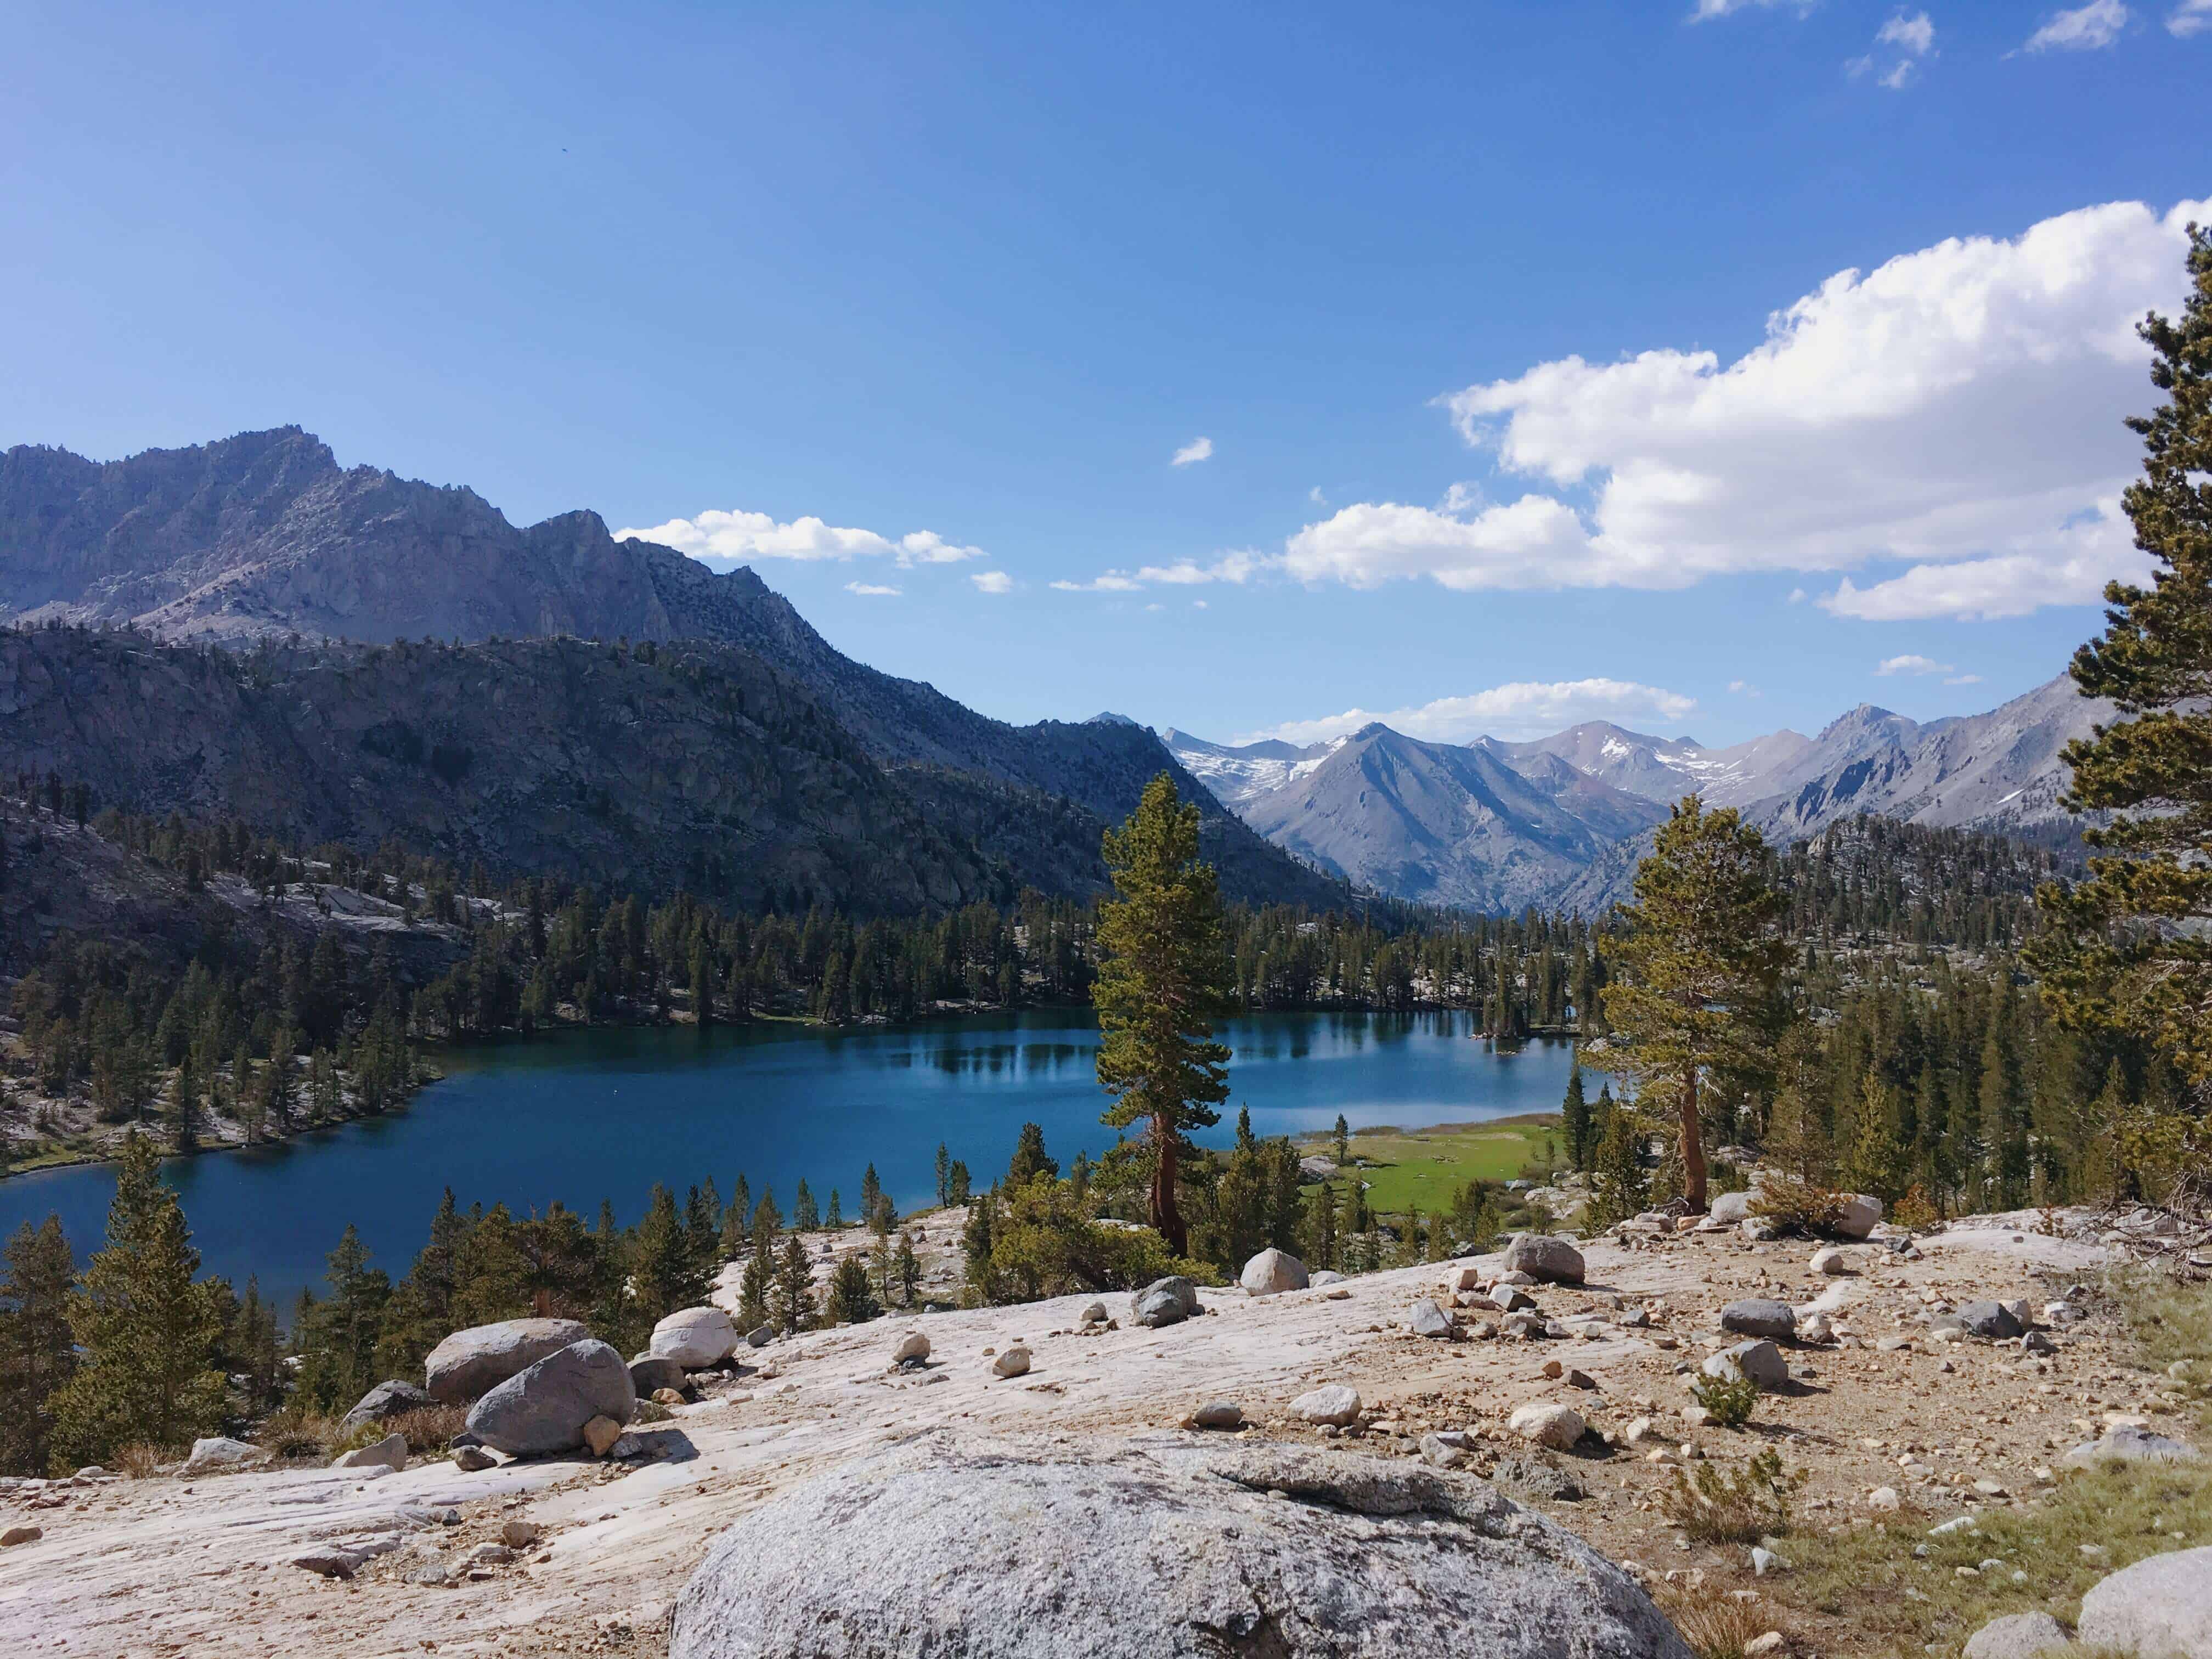
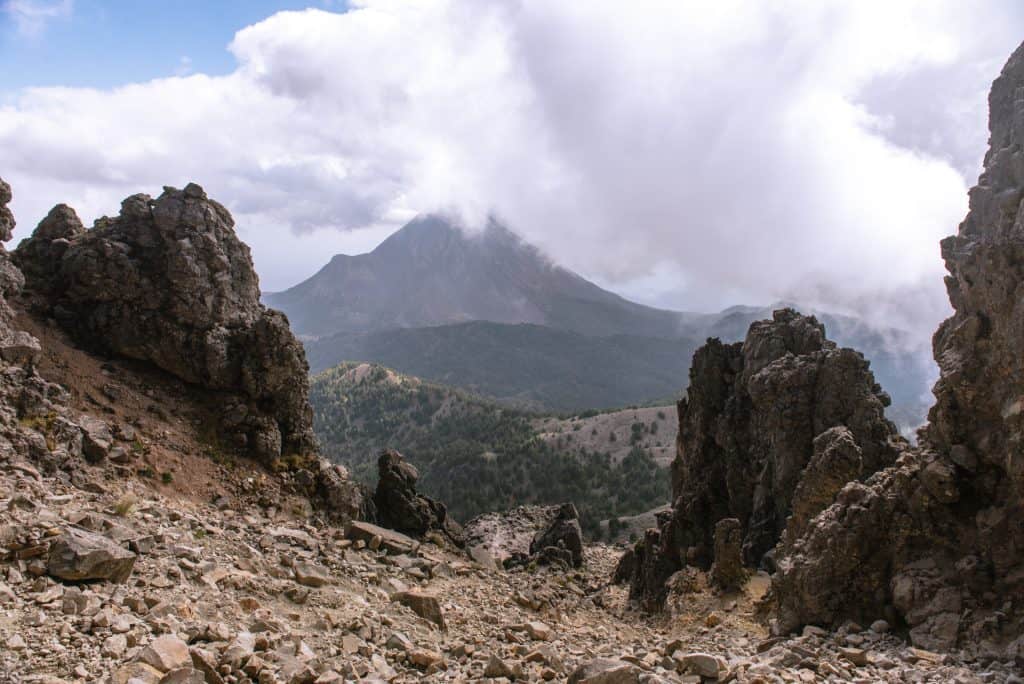
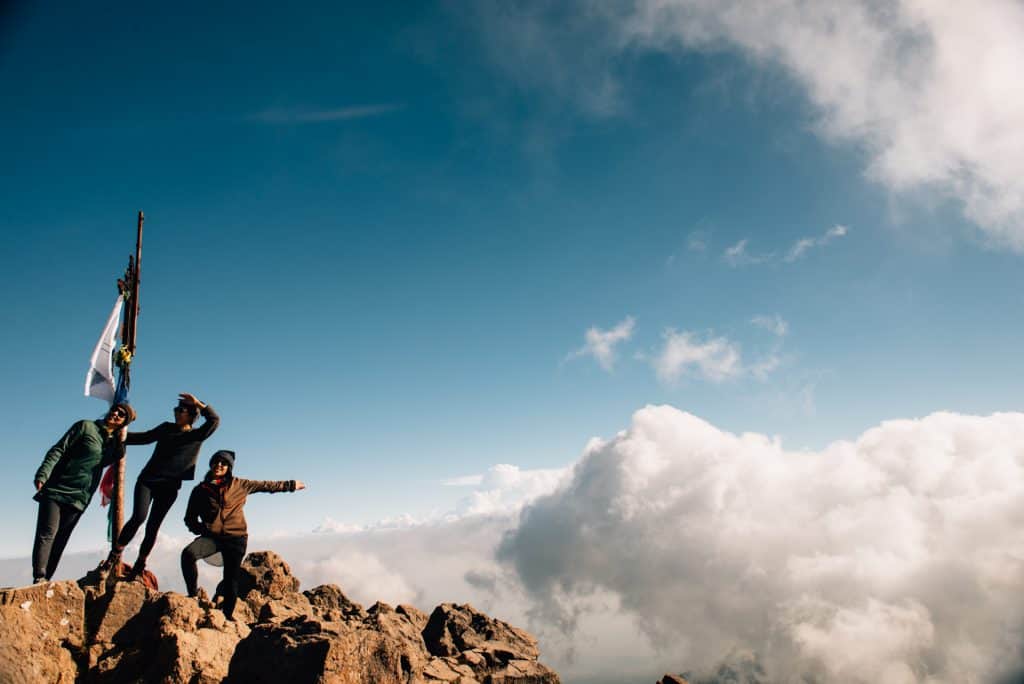
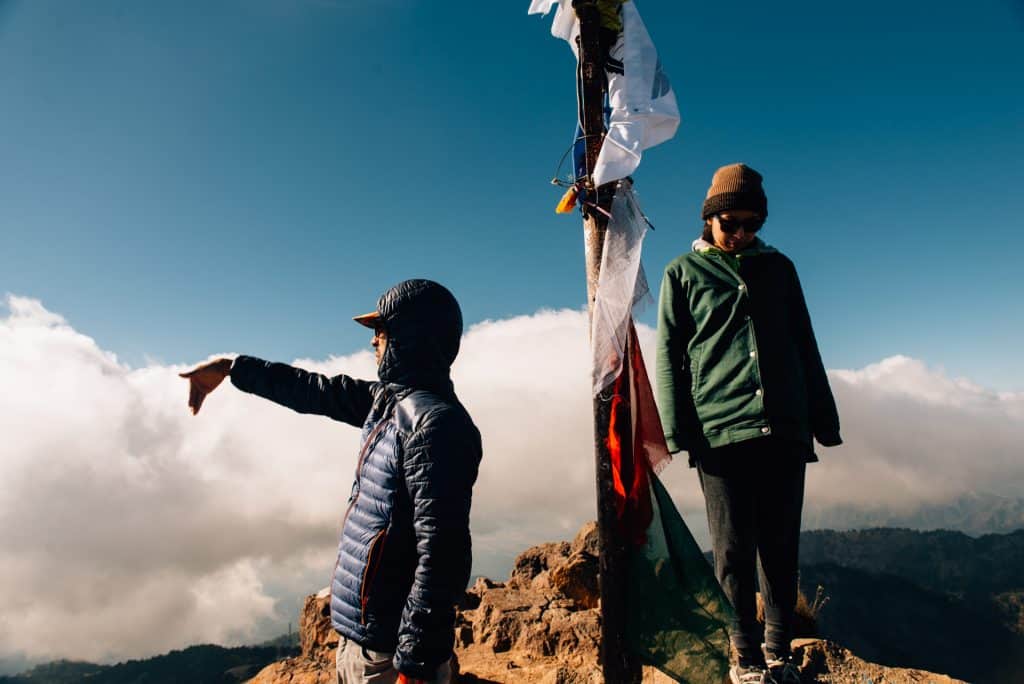
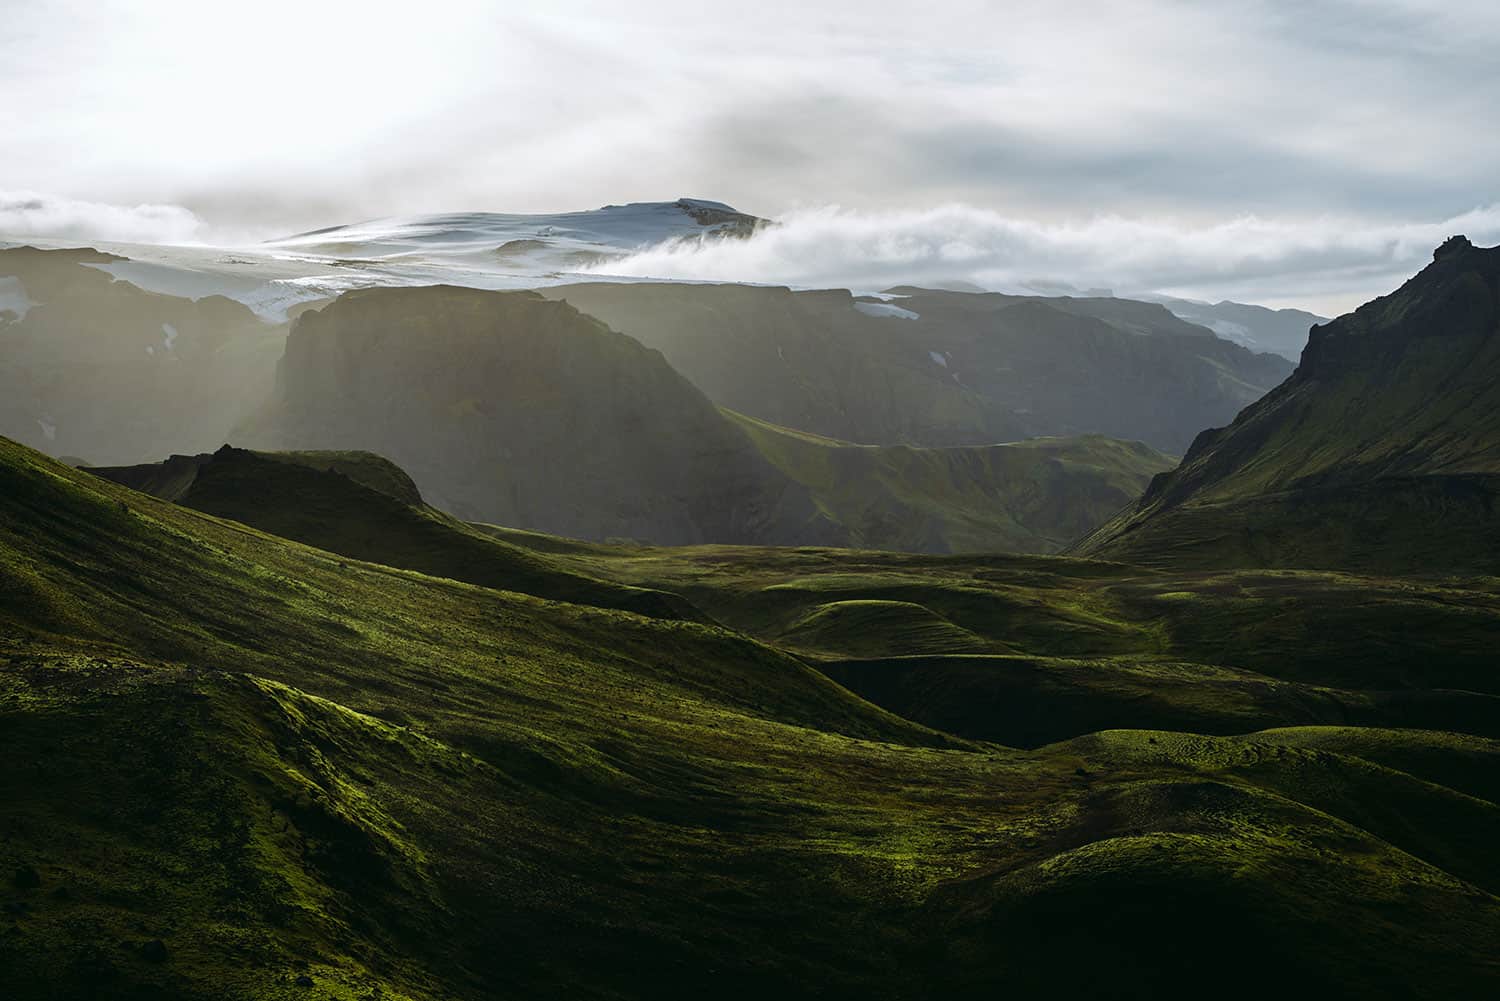
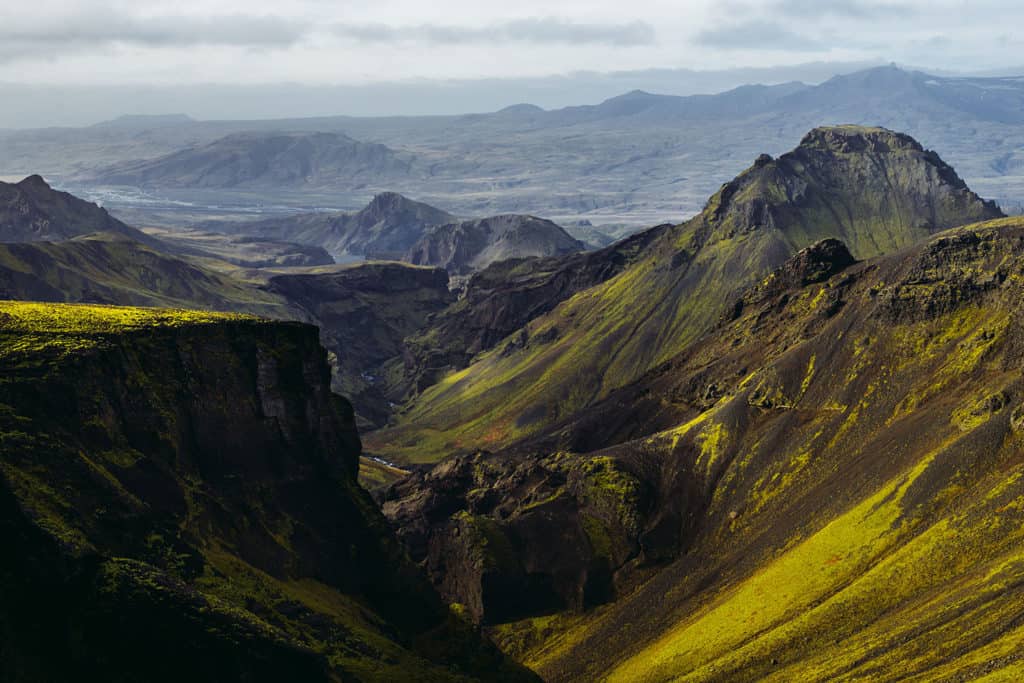
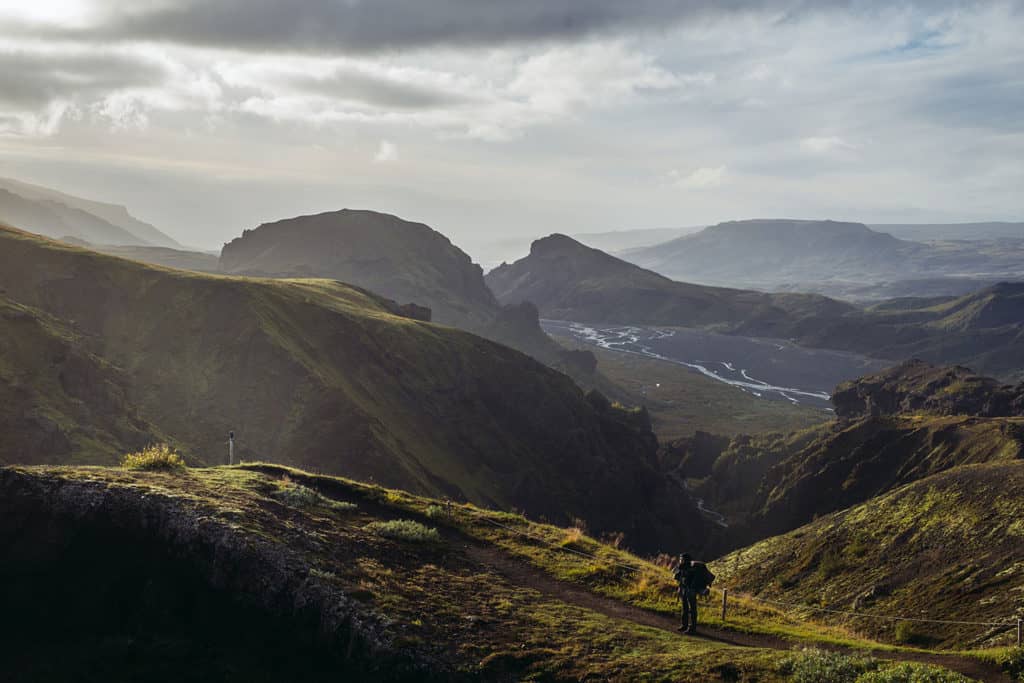
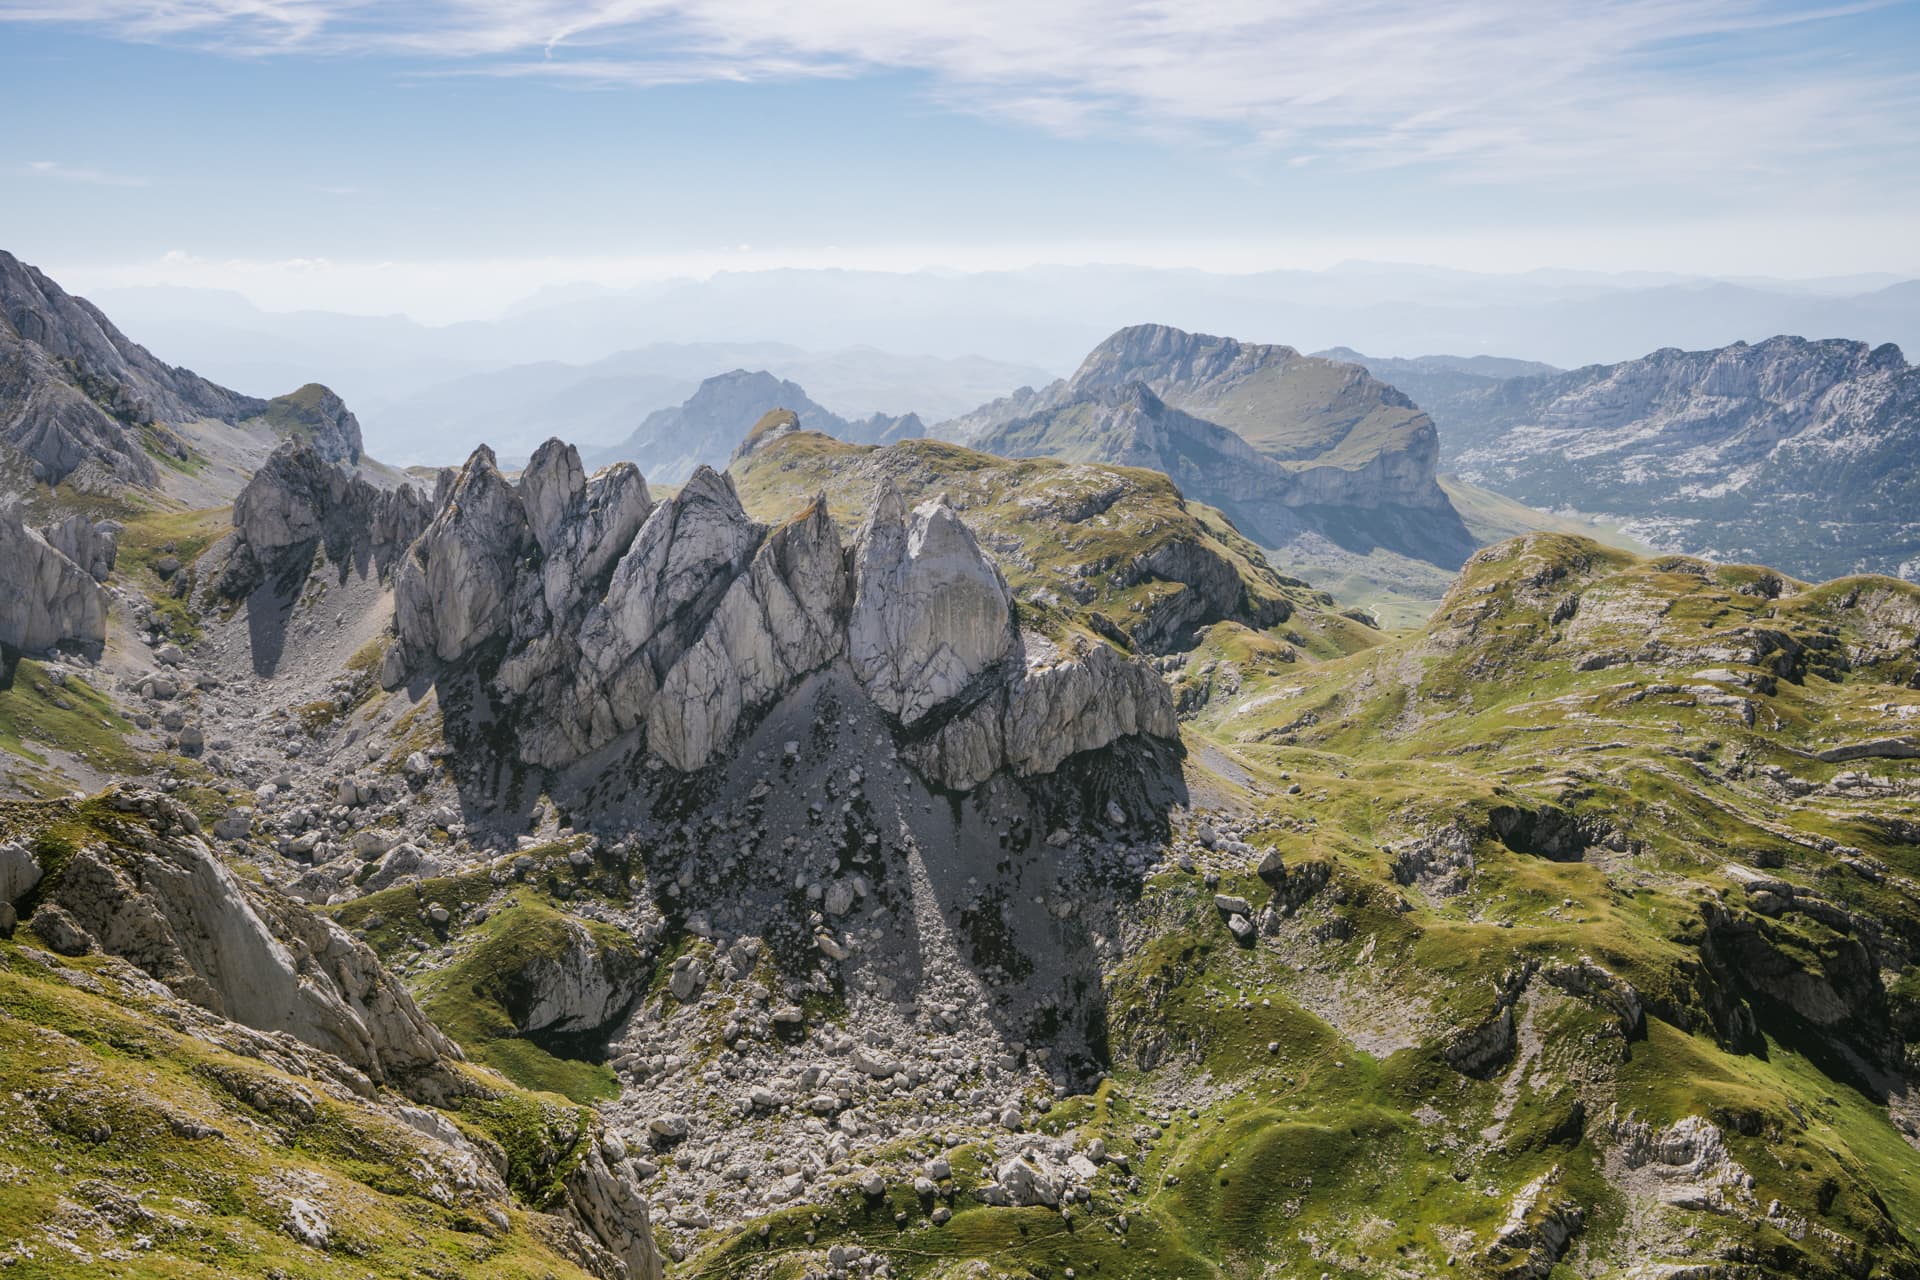
Bobotov Kuk's summit has a truly stupendous view — if you do a 360º you can see Montenegro, Bosnia and Herzegovina, and Serbia all from the same spot. Probably one of the most rewarding viewpoints I've ever had the privilege of witnessing. The mountains below have intriguing crepe-cake like folds that resulted when African plate collided with the Eurasian plate and crinkled and folded the surface of the earth. Bobotov Kuk was originally thought to be the highest point of Montenegro (at 2,523 m), but has since been dethroned by three other peaks in the Prokletije region. Nonetheless — it's still epic. We had a rewarding lunch and people watched for some time at the summit.

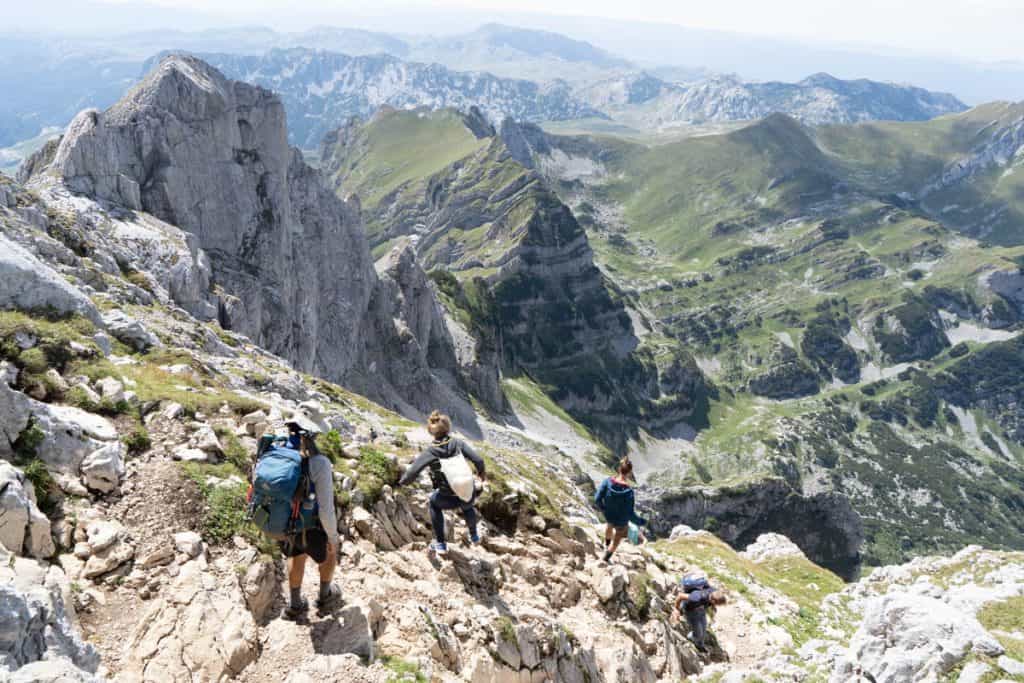
While I don't typically have a fear of heights, I'll admit going down definitely did give me the chills. One could argue that the path down is even more challenging than the path up. Scree is even more difficult to navigate going down. Definitely be cautious of how you descend, as loose rocks can easily injure hikers below. The descent is really where hiking poles come in handy for arresting potential falls. We saw many people slip on the way down, so take it slow and easy!

Group of people walk down steep path from Bobotov Kuk
Having a beer at Katun Lokvice

While we were tempted to stay another night at Katun Lokvice campsite with our new-made friends, we decided to pack up our tent and head back to Žabljak to get a headstart the next day. If you can, carry the beer/coca-cola cans you purchase at the campsite back down to recycle it. It's tough for the Katun Lokvice groundkeeper to transport any trash out so he makes a garbage fire near his home to burn all the cans hikers buy, so better to carry it out with you.

With our legs feeling like jelly after the long day, we treated ourselves to a nice meal at Caffe & Restaurant Or'O, which had a sleek ski resort vibe — food was great and a very hearty change from our last few stoveless meals. We ended the night at the nice and convenient cabin at Olja Guest House for 20 euros.


Follow our latest adventures on Instagram.

January 25, 2019No Comments

Through the Dunes to Cabo Polonio, Uruguay

From Valizas, we crossed the ever-changing dunes of the national park to reach Cabo Polonio (El Cabo), where the wind carries the cries of sea lions and where dolphins surf by the shore. Lit mainly by sun and candlelight, the darkness of the night is only interrupted by the rhythmic sweep of the lighthouse beam. A breezy 2-hour walk brings you off the grid to one of the wildest parts of Uruguay's coast. Read on for details.

Good to know:

  • Distance: 5.1 miles (8.2 km). GPS log.
    Duration: 2-3 hours
    Difficulty: Easy
  • Bring water. There are no water sources until you reach Cabo Polonio. 
  • THE SUN IS NO JOKE and there is no shade. Bring sun protection (sunscreen, hats, etc.) and start your hike early or after 4PM to avoid the effects of the strong sun. Remember that major hole in the ozone layer over the South Pole? Yep. 
  • Bring headlamps or flashlights. There's no electricity in town, so this helps for navigating after dark.
  • Bring cash. There are no ATMs.
  • Bring tampons/pads. I don't think I saw a place to purchase these products.
Idyllic summer glow of the reserve's dunes.

On New Year's Eve, we decided why not start the new year with an adventure to Cabo Polonio? Vincent had visited a few years ago and fell in love with the secluded beach town that was famous for its relaxed atmosphere and lack of electricity and running water. We hastily looked up last minute Rutas del Sol bus tickets and lodging options, but it seemed like the odds were stacked against us — in the recent years Cabo Polonio had become a popular destination for Uruguayans, Brazilians, and Argentines and we were entering the short peak season. None of the bus tickets to Valizas could be purchased online and we couldn't reach them over phone. In a last-ditch effort, we headed to Terminal Tres Cruces in Montevideo to see if we could buy tickets in person since we had heard that sometimes they issued standing tickets when seats were sold out. As luck would have it, we were able to buy early 6 AM tickets to Barra de Valizas from the ticket counter. Apparently, you can only buy early January tickets in person since they're in such high demand. With the station wifi, we booked the last available Airbnb and crossed our fingers hoping we would have a place to stay.

Fast forward through all the NYE lechon and fireworks, we hauled ourselves out of bed after 3 hours of sleep and headed to the bus station. Luckily, the Rutas del sol bus was decadent in comparison with Megabus — it had full reclining seats and we easily slept through the 6-hour bus ride. As we rolled into Valizas from the main highway, we spotted several hitchhikers competing for a ride — a duo even had their guitars out and was strumming a song to woo passing cars. When we got off at Valizas, we found out there were only 3 ways to get to Cabo Polonio:

  1. A two to three-hour hike.
  2. Wait for the next bus to take you to Cabo Polonio's visitor center and take the 4x4 truck to bring you to the beach town. If you don't want to hike, you should actually buy a Rutas del Sol ticket to Cabo Polonio, not Valizas, this would remove this extra step.
  3. Face the tough competition and hitchhike to Cabo Polonio's visitor center, then take the 4x4 truck. The last option was the least appealing, it required a walk back to the main highway, stiff competition and also at midday there likely very few cars headed that way. 

We decided to head to Valiza's beachfront cafe La Proa to grab a bite and think through our plan. In this area, the must-order is Buñuelos de algas, which is essentially super crispy and DELICIOUS seaweed tempura. We hung out there and then people watched for a few hours. Barra de Valizas lends itself to more commercialism because it's reachable by car, there was an eclectic crowd of families, beach hippies, and backpackers.

By 4:30 PM, the heat subsided and the shadows mellowed, we decided it was time to start our hike (the sun is no joke here so time your hike carefully). We grabbed a generously proportioned milanesa (chicken cutlet sandwiches) snack from the supermarket and started on an in-land road that ran parallel to the beach houses. After five minutes, the road opened to an expansive view of the river crossing that we were warned about. It was completely different than what I imagined, it looked more like a yawning sandbar rather than a river that fed into the ocean. Kids played in the middle of it and people crossed it at all different points, with some areas deeper than others. Here you have two options, you can pay for a riverboat to take you across for a small fee. Or you can do what we did, hike up whatever you're wearing, hold your backpack over your head and cross. Some beachgoers helpfully pointed us to the shallowest section, and while the water reached my chest in some areas (I am short), the water was lukewarm and gentle, making for an easy crossing (nothing like the High Sierra's river crossing I had braced myself for).

Once we padded ashore the dunes seemed to stretch on forever, only punctuated by the ant-like people playing across its surface. Here you can go as the crow flies, cutting straight across the dunes for a shorter route, or you take a longer route that hugs the coast. I recommend the former, as it gives way to a diverse landscape and gives you a chance to explore some of the tallest dunes in South America (there are literally sandboarders that come here)! Also, as long as you have Google Maps or some sort of GPS or make note of where your shadow is — it's not so expansive that you'd get lost. After some time, you will see Cabo Polonio's famous lighthouse in the distance, making it an easy beacon to follow. 

Looking back at the river from the top of the dunes.
A grass draws a circle around it mimicking a sundial
This is pasto dibujante, a.k.a. cartoonist grass, named for the drawings it etches in the sand. 

As we hiked, the wind was literally wicking the sand off the dunes, casting a dreamy glow and quickly covering up each step we took. Here they call them 'dunas móviles' as they seem to have a life of their own. It was only at the top of the dunes when I realized how unique the landscape was, to our right was a stretch of sand that crept into the river and beyond that a grove of trees. The path ahead of us resembled a Martian landscape, with moon rocks submerged in the sand. We went barefoot as long as until we hit the swamp-ish looking grounds that had some thorny plants. It was here that I RANDOMLY felt this shooting pain in my arm and looked down to see a windswept wasp that had landed in my arm stinger-side down. This sucked, but for some reason was more funny than painful and it was better than the time I fell on stinging nettle in Peru. After a certain point, it became easier to walk barefoot on the tightly packed sand by the waves. Here we began to see the occasional sea lion carcass. South American sea lions and Patagonian sea lions have flocked to El Cabo, taking up residence by the lighthouse, and their wails can be heard throughout the town.

Can you see Cabo Polonio's lighthouse on the far left?

Two hours later we neared the town, our place (which is unfortunately no longer on Airbnb) was one of the first houses we passed. The house had a structure for aerial silks and felt simultaneously more luxurious than people had described for what you'd find in El Cabo, but also basic for a $95/night room. We had a bedroom and bathroom light and a communal shower that gave warm running water (all connected to the electric generator). 

El Cabo's reputation preceded it, people described a raw landscape and idyllic hippie commune of sorts that was marked by no electricity and no running water — the perfect place for people looking to get off the grid. Some of this was true, time felt slower, untethered horses meandered gently through the meadows, dolphins played by the shore, people walked barefoot to centro, and nightly paths were lit by candles in wine bottlesAt the same time, it was also becoming increasingly hip and bohemian-chic, there were pricier restaurants, fashionistas that wore Missoni to the beach, and vegetarian restaurants (surprising for a small beach community considering that Uruguay is after all the world's biggest beef consumers). 

two men stroll on the beach

When I think back on it, I don't think we really did anything, which was the point. Lulled by the waves and pace of town our day of lounging was punctuated by eating, reading, and walking. I imagine it'd be the perfect place for a writer to retreat to. Perhaps the most daunting task was finding wifi to figure out if Vincent's plane was leaving the next or following day, in which a posada owner kindly lent us her mobile hotspot — otherwise, don't expect to have access.

4 men look out into the distance at a rock populated with sea lions
You can see the sea lions so close! They are called 'lobos marinos', which means sea wolves (not sea lions). It feels like a more accurate name when you hear their howling.
rocks covered with sea lions
Back in the day sea lions were hunted for the skins, now they are free to chill out on the rocks.

The most exciting moment was a relentless tropical storm that swept through and caught us at the bus station. Strangers alike huddled together for shelter and at the end of the day we ran back to our place blinded by the rain and crashing through huge puddles. My favorite treats were getting the handmade alfajores de maizena and ginger squash tamales from the supermarket. The days we went were misty and windy so we didn't go swimming, but there is apparently a "surf side" and a "swim side" of the beach for El Cabo. I'm not sure which is which, but for reference, the northern Playa Calavera (named skull beach — legend has it in 1892, the Brazilian battleship Solimões was shipwrecked and the bodies of 123 sailors washed ashore) is marked by two fishing boats on the shore, and the southern Playa Sur is where you go to see sunsets. We didn't see any surf rental places near Playa Calavera, but for those who bring their boards, it's apparently normal for sea lions to surf alongside you!

Getting there:

Map to Cabo Polonio
See GPS log here.
  • To do the 2-3 hour walk, book a morning ticket to Barra de Valizas from Rutas del Sol from Tres Cruces bus station in Montevideo. To get to Cabo Polonio by car, book a bus ticket to Cabo Polonio instead and take the doubledecker 4x4 truck to the actual town. IMO the hike was the highlight of the trip. You can get the best of both worlds by hiking there and taking the truck out.
  • Note, there is a Rutas del Sol booth in the town of Cabo Polonio so you can buy and modify bus tickets.

Where to stay: 

  • I don't believe you can camp on the beach and lodging fills up pretty quickly due to the short season. There are many hostels. El Cabo is pricey — expect~ $90/night for a private room.

Words and photos by Vincent and Jocelyn. Follow our latest adventures on Instagram.

January 24, 20192 Comments

Hiking Rae Lakes Loop in Kings Canyon National Park

The 42-mile Rae Lakes Loop in Kings Canyon Sequoia National Park, is for some, the definition of type 2 fun. With bears, rattlesnakes, mosquitos, a glacial pass, and washed out bridges there was never a dull moment. Though, these are the same unforgettable views that inspired Ansel Adams might just be worth the adventure.

  • Distance: 41.2 miles
  • Duration: 2-3 nights (~14 miles/day or 10.3 miles/day respectively).
  • When: Late spring or early fall (we went June 11th).
  • Difficulty: Hard (early season), Moderate (late season).
  • Direction: We recommend counterclockwise, read on below to see why.

Good to know:

  • Wilderness Permits are required. You can reserve it 2-weeks in advance, but they also have ten first-come-first-serve day-of permits starting at 1 PM at Road's End ranger booth.
  • Bring a mosquito net and bug spray. They are relentless and will swarm you.
  • You need a bear canister. Luckily these are available for rent at the ranger station at the trailhead. For those ULW junkies, they also have carbon fiber ones available for rent at a higher price. You can return it at the collection site whenever you finish.
  • Wear long pants - these come in handy for many reasons: avoiding mosquitos, less risk of snake bites, and warding off ticks from the heavy brush.
  • Water filter - there are plenty of places to refill!
  • Sun protection - There are many spots where you have persistent sun exposure. At Glen Pass this is magnified by high elevation and the snow.
  • NPS has a great breakdown on campsites by distance.

Day 1 - Road's End to East Lake Trail  
11.24 miles, ↑ 3,177 feet elevation gain (GPS log)

We went to the ranger's station at Road's End hoping to score a walk-in permit for Rae Lakes. By the time we decided to do the hike, it was too late to reserve online (2-week minimum), so we made a point to arrive at 1 PM — the earliest time permits were being issued. Luckily they not only had availability, but they also had bear canisters available to rent. Also, we were happy to learn that the marmot stowaways were less of a problem in this region of the park, so we didn't have to wrap up our car. We decided to go counterclockwise, namely because l like getting over the climb earlier than later.

The hike opens with a sandy trail, which soon fed into a wooded area. The wooded area had several areas that were recently charred and still smoking, but to our relief, there were signs that indicated that these were "controlled fires." After crossing a wooden bridge, we had to figure out how to cross Bubb's creek. It took some trial and error (unnecessary bushwacking and log crossing) to find that the best place to cross is further on the path east, where you'll spot a crossing with some strategically placed stepping stones. Here you can cross with the help of your poles without even getting your feet wet (?Also a great place to fill up for water).

Later in the day, the terrain opened up into a steep rocky sun-exposed climb. Emboldened by our fresh trail legs, we were walking particularly fast until we startled (and was in turn startled by) a two-foot-long rattlesnake that rattled at us before darting away. A passerby clearly had this on his mind, warning us, "watch out there are rattlers!" without stopping for a breath. Normally, the snakes dart away feeling the vibration of your poles, but be alert and examine crevices around anywhere you decide to take a rest.

Soon after the exposed ascent gave way to a cool wooded area, which gave us relief until a bear bounded across our path a few feet away. We instinctively started our bear dance complete with hiking pole moves. This dance was hilarious now that I look back on it. I am only 5'1" so trying to "look big" is tough and comical - the bear considered us from a distance, most definitely weirded out, and just kept walking without turning back.

⛺ We camped out around Junction Meadow near another solo camper.

Day 2 - East Lake Trail to Glen Pass to Dollar Lake
12.47 miles, ↑ 3,387 feet elevation gain (GPS Log 123)

While we were excited to cross Glen Pass today (elevation 3,651 m, 11,978 ft), we heard so much contrasting advice that it was a bit hard to figure out when to cross it. Some told us to hit the pass early, to enjoy the benefits of stiff snow without post-holing, while others said later was better so that the snow wasn't icy and slippery. We ended up crossing around 1:30 PM, which in our opinion worked well with our hiking poles. The view from the pass was stupendous. We were flanked by craggy peaks, glacial lakes, and snow, but it was also windy, so we soon started downhill. We didn't see a single soul other than some birds and a chipmunk running in the snow.

After crossing the pass, we were now going downhill and everything felt like a breeze. However, the mosquitos did become increasingly abundant, perhaps due to the number of lakes. Dollar Lake was particularly bad. Some of the clockwise hikers we met seemed to be plagued by the mosquitos — perhaps another reason to go counterclockwise (you pass through the "mosquito-lands" at a faster downhill pace). The mosquitos were probably the most intolerable aspect of the hike, and ultimately the reason why we shortened our hike to three days, instead of four. One hiker we met exasperatedly said, "I just want to get out of here."

⛺ We camped out on a high outcrop a little beyond Dollar Lake. It had an expansive view and a breeze that kept some mosquitos away. At night, excited to see the stars, I opened our tent and to my shock saw the third bear of the day a few feet away. Thankfully it seemed to mind its own business and we slept in peace, even the bear canisters were undisturbed when we went to check them out in the morning.

Day 3 - Dollar Lake to Roads End
18.28 miles, ↓ 4,310 feet elevation loss (GPS Log 123)

The most dramatic part of our last day was crossing the south fork of the Kings River. South Fork Kings River Bridge washed out and won't be replaced before 2019 (see latest trail updates). Earlier, our ranger had warned us to not to take the river crossing lightly — people have died while trying to ford this river. Before crossing unbuckle your backpack chest and waist straps, this way if you're swept into the current you can easily ditch your bag — giving you a higher chance of surviving. Properly stow your things and waterproof them if possible, and cross with shoes on. Luckily, as we were assessing where the best place to cross was, we saw another solo hiker across the river. We shouted intel about our respective sides and worked together to decide where to cross. After settling on an area we started wading into the freezing water. The rapids were strong, people might have easily been swept away with one miscalculated step. Hiking poles were helpful for bracing against the current and testing the depth of areas. Halfway through the crossing were two overturned trees, we walked across the first one, but had to climb over the roots of the second one to pass it. At this point, we met the other hiker coming from across the way and helped each other hold hiking poles so we could use our hands to clamber up the tree. We bid each other luck and did a victory dance after both parties reached solid ground on the other end. We bushwhacked for a bit to the trail path and took a break to dump the water out of my shoes.

Shirtless man tries to cross a knee-high river
Why did Vincent attempt the cross the river shirtless, only he knows.

After some time the trail opens up into exposed rock for some time. Gradually we came across a blissful meadow, then roaring falls, and then one of the most epic views into the valley. Finally, it converged onto Kanawayers trail back to the parking lot, where we sped off to celebrate with an In-N-Out burger. The burgers were delicious.


Photos and words by both Vincent Ribeiro & Jocelyn Chuang. Follow our latest adventures on Instagram.

December 9, 2017No Comments

Hiking Nevado de Colima (Zapotepetl) in Mexico

At 4,340 meters, Nevado de Colima (a.k.a. Zapotepetl or Tzapotépetl) is the seventh highest peak in Mexico and can be summited within 8 hours starting at Ciudad Guzmán. We had the whole trail to ourselves for the four-hour hike and enjoyed impressive views of neighboring Volcán de Colima along the way up. Volcán de Colima has a history of 40 eruptions (most recently in August 2017) and has deservedly earned the nickname Volcán de Fuego — for this reason, it is not hikable.

How did we get here? It started with an impulsive late-night decision to summit Nevado de Colima while staying in nearby Tapalpa. We foolheartedly entertained the idea of hiking the volcano ourselves when we couldn't find enough information online, but thankfully looked into hiring a guide after consulting others in Tapalpa. From there we connected with Gerardo from Nevado de Colima tours who luckily accepted our last-minute request for a hike the next morning.

At 10 AM, we met our guide Gerardo at Ciudad Guzmán's town plaza, where we picked up fresh carrot juice and tamales from the market square — and tortas as a lunchtime snack for the summit. While Gerardo has a 4WD vehicle available, he suggested driving up to the trailhead with our sedan. This is doable for someone who knows the road well (in Gerardo's case, 10 years of driving up and down the road), but otherwise, a 4WD vehicle recommendation is warranted. Parts of the mountain gravel road were undependable and at the end, our little car couldn't make it up to the 'official' parking lot and we had to drive down part of the pockmarked road backward to find a suitable place to park.

Upon entering Parque Nacional de Nevado de Colima we signed in and pay a small fee of ~30 pesos per person. At around 3,500 meters we encountered a locked gate (a recent addition), to which only guides and officials have the key - hikers who attempt to slip by the gate are typically told to turn back if caught by an official.

Town is covered by volcanic soot, with people investigating the piles of ash. A mountain can be seen in the backdrop.

Ciudad Guzman after one of Volcán de Colima's biggest eruptions in 1913. Residents woke up to a layer of ash 15 centimeters thick. Image source.

Gerardo studied conservation, eco-tourism, and is also a certified mechanic. As a result, he's knowledgeable about local environmental issues and questions you may have relative to the hike and its surroundings. He and the other residents of Ciudad Guzmán opened our eyes to the tremendous environmental strain that avocados have caused in their area. Because of the hip image cultivated around avocados, demand grows at a remarkable rate of 15% a year. This demand has, in turn, created massive deforestation in Mexico (at a rate of 2.5% a year) and pest fumigation has polluted local drinking water and suspected to be the culprit behind liver issues in the local population. With 40% of avocados being grown in Mexico, the country bears the brunt of USA's market demands. Just another reason why you should reconsider your avocado toast addiction. One of the residents actually introduced us to the chayote fruit, a more environmentally-friendly snacking alternative local to the region.

In more optimistic news, Parque Nacional de Nevado de Colima has invested in reforestation efforts, and nurseries of baby fir trees stretch out across the last meters before the trailhead. After parking our car, we walked up to the trailhead near the radio antennas and encountered a group of scientists who were monitoring the sounds of Volcán de Fuego. The area felt tremendously quiet from our perspective, but many of the sounds volcanos make are often below the frequency limit of human hearing, so we bid the scientists goodbye and let the devices do the listening.

Seismic devices listening closely to Volcán de Fuego.

Entering the brush to the right of the road, we began the hike in a temperate forest, surrounded by juniper and oak-fir. The trees soon thinned out and gave way to moss and zacatonales, marking the start of the alpine tundra. Beyond the entry point, the trail was devoid of signage and we would've likely gotten lost after entering the rocky area where it became less obvious where to walk.

Opps look what we got for an extra hour of sleep. The weather is not kind for late-owls.

While not a technical climb, more care was required once we started ascending the mountain. I was thankful for the gloves Gerardo lent, as grasping onto the jagged holds made ascending much easier. We could easily feel the effects of the high altitude, as our breaths got shorter, though luckily we didn't experience any altitude sickness (other than a slight headache after the hike). We suspect that staying overnight at Tapalpa (1,950 m elevation) helped acclimate us. Whenever struggling through high-altitude hikes, I remember the advice I once heard in Peru to "breathe deeply as if you were smelling flowers" and continue to power through.

Fog and clouds occasionally rolled across the landscape, blotting out our view of Volcán de Fuego — our own fault really, as we knew that an earlier start ensured better visibility, but traded the views for some more sleep. While we read reports of Volcán de Fuego temperamentally exploding several times a day and saw photos of hikers with plumes of smoke in the background of their photos, the volcano was silent throughout our hike. Despite the dry months of November to April being peak volcano mountaineering season, we didn't see a single soul on the trail.During breaks, we simply sat and marveled at the quietude and texture of Volcán de Fuego. Recent lava flows and landslides etched lines into its slope, while vegetation settled into the grooves of lava flows.

Once we reached the summit we were treated to 360º views of the Colima Volcanic Complex and scarfed down our lunch by the Flagstaff that marked the summit. We sat and rested in the crater of the extinct Nevado de Colima for about half an hour before setting back down the mountain.

Halfway up the mountain.

Man overlooks mountain view

At the peak, we could see the progress of our 2-hour hike — we started from the antenna on the right!

Three girls at the summit of Nevado de Colima

Above the clouds at the summit of Nevado de Colima.

Man points his hand at horizon to measure the remaining hours of sunlight

Another risk of starting late — you could end up driving down in the dark. Gerardo measures how many hours of sunlight we have left for the rest of the hike and drive down.

Going down was way easier than going up, we even dared running down the last stretch of the hill. Walking back to our car, we heard the sounds of woodpeckers and spotted mountain lion tracks in the volcanic ash. Apparently, pumas, tigrillo, and ocelots are all native to the mountain — though not frequently spotted on Gerardo's trips up the mountain. On the way down, we got pretty close to emptying our tank of gas which would have been disastrous — luckily we were able to get some additional fuel from the officials at the entrance gate of Parque Nacional de Nevado de Colima and got back to Ciudad Guzman just fine.

We ended the night with an impromptu Thankgiving dinner at a local taco place, filled up from the day's adventure, new friends, and delicious food.


The Rundown on Nevado de Colima

How long does it take?

Short way: 8 hour non-technical roundtrip hike - split between a 4-hour drive up the mountain and a 4-hour roundtrip hike.

Long way: 3-day roundtrip thru-hike. More information can be found here.

What to bring

Temperature transitions from hot to cold (70º F - 30º F in November) depending on your elevation and the shade — so layers are key. Nevado means 'snow-covered' for a reason, so prep for snow in the winter months. The terrain comprises of volcanic ash, so hiking shoes are ideal (but it's doable in sneakers!). Gloves are also helpful, as you'll often be grasping onto rocky holds as you ascend and descend. Gerardo, our guide, helped provide helmets as loose rocks from the sandy terrain can get dislodged as you ascend and descend.

Tips

Best months for climbing are the dry seasons of November through May. Start your hike in Ciudad Guzmán with a guide like Gerardo, since it's actually closer to the base than Colima. The earlier in the morning you start your hike the better, as there's a better chance of good visibility - also no cars are allowed up past 2PM. Bring change for entry to the national park - otherwise be prepared to get chocolates in exchange for change if the gatekeepers don't have change on hand. To check volcano conditions, one can peek the livecam and call Proteción Civil in Colima 1 (331) 45944, or as we suggest, secure a guide.


December 2, 20162 Comments

Hiking Fimmvörðuháls

Finding solitude in Iceland is more difficult than it sounds.

While we're fed a steady stream of Iceland images that seem to be set in the remote wilderness, many of the famous sights and waterfalls are within 5 minutes walk of a parking lot or constantly inundated with selfie-stick wielding tourists. At times you even start to run into tourists – funny for an island that's 39,769 mi² (roughly the size of Maine). One man even remarked to me, "I can't escape the drone! I've been to three sites and the man flying the drone always turns up!"

Accessibility to natural sights is totally underrated – so I'm glad Iceland does a great job of it. However, for those who are looking for some more solitude it often means spending a bit more to rent a 4WD to get into the highlands or strapping on hiking boots. Being on a tight budget, we opted for the latter.

We seized the opportunity to go on a long hike after finding out we had a rare Autumn day of 100% sunshine coming up on via vedur. Our spur of the moment ambition to hike to Þorsmörk, led to some frantic mobile phone research, while pressed against a closed wifi-emitting booth at 11 PM the night prior. We ditched the idea of hiking there from Seljalandsfoss, and opted for the more conventional Fimmvörðuháls trail (aka Five-Cairn Trail) that starts at Skógar.

South Iceland landscapes

Common FAQs about Fimmvörðuháls.

No. Only 4WDs. There is the option to bus to Þorsmörk without the hiking, or bus back after one-way hike (runs from mid-May to mid-October). You can leave your rental car in the Skógafoss public parking lot for free.
The Fimmvörðuháls trail is 25km long (estimated 9-11 hour hike), but it depends on your end destination (see 'Where do I sleep'). Altitudes reach over 1,100 m. We did it in one day, but some prefer to split it into a two day hike.
It's a popular trail, and it is neatly marked with wooden poles, which become tall yellow poles when you reach the glaciers. With good visibility, we had no problems, however; fog can complicate that. You may have difficulty with wayfinding when the ice on the glaciers build up and decrease the visibility of the yellow poles.
This is dependent on the weather. We hiked it at the end of September, some people say ~ October is when it should be off-limits for hikers. Be sure to confirm the trail status with locals establishments.
Check out Ultvist's recommendations. Rain, snow, and high winds are not uncommon, even in the summer, so be sure to be prepared!
Listed by distance: There are two no-frills huts around 16km and 20km into the trail. These huts are small and require booking in advance (and are usually only open mid-June to mid-October, ~65000 ISK). Near the end of the trail into Þorsmörk, is the campground Básar (24km in, N63°40,559 / W19°29,014). Next would be the lodge Skagfjordsskali (28.3km in, 63°40.960 / 19°30.890), and the fanciest for last – Volcano huts (30 km in). You're not allowed to camp off the trail, however; use your judgment if you find yourself in an emergency situation.

Fimmvörðuháls was perhaps the most demanding, yet subliminal hikes I've ever done. You start by climbing to the top of Skogafoss and for some time, you can slake your thirst with glacial run-off that's tumbled down the numerous waterfalls you'll encounter.

Then incredible wind. The scenery transforms into otherworldly hues, as you pass Magni and Móði – spawned by Eyjafjallajokull's 2010 eruption.

volcanos near eyjafjallajokull

Baldvinnsskali hut bathrooms

Outhouse of the newly rebuilt Baldvinnsskali hut.

Volcanoes-iceland

Móði and Magni, the two new craters that emerged from the Eyjafjallajökull eruption.

A monochromatic landscape dramatically opens into the lush vista of the Land of the Gods (Goðaland).

hiking-thorsmork

The river(s) in the distance is the one you would have to cross with your vehicle to drive into Þorsmörk!

Cat’s Spine (Kattarhryggi) calls command of heights, with a real risk of teetering off the either side of the ridge. It's flanked by velvety hillocks and a craggy primordial landscapes.

Thórsmörk-landscape

backpacking-FimmvörðuhálsFimmvorduhals

By the end of Fimmvörðuháls I was definitely on auto-pilot, footslogging my way through due to dehydration (eat sodium-heavy camp food in moderation), though the intoxicating feeling of drifting between planets and fiction is something I'll remember for a lifetime.

We reached an eerily empty Básar at the end of the hike – and as if on cue, the sun set behind the mountains. Soccer nets and burnt campfires seemed frozen by the arrival of autumn, however; fresh bananas in the trash and an up-to-date weather report hinted live habitation. What looked like complete abandonment of the site meant we had our top pick in terms of camping spots. We got to work setting up our tent and cooking ramen and ginger tea for the night.

Despite our minimal packing goals, at the end of the hike, I realized that John McPhee’s The Control of Nature hitched a ride in my backpack. Luckily, the stories of how humans have made foolhardy, cartoonish, and sometimes "successful" attempts to tame nature made for the best tent read-aloud. The chapter Cooling the Lava, an epic hail mary involving dedicated manpower and puny water hoses to stop lava from reaching an Icelandic harbor, seemed fitting to read while nestled in the shadow of Eyjafjallajokull.


Photographs by Vincent Ribeiro and Jocelyn Chuang.

Other great resources that cover hiking Fimmvorðuháls can be found at Spice & Dice, Iceland for 91 days, and Alex Buri's write up on KimKim.